

Question:
How can I increase the length of a field text in DocuWare versions 7 or higher?
Answer:
By product design, field length cannot be modified once created. However, a new field with the same data type and the desired length can be created to copy the data from the previous field to the new one.
*Note: This method requires that you have a license for Autoindex. If you are working in an on-premise system, take a backup of your database and cabinet storage location first.
1. Go to the Database Fields tab of the File Cabinet that has the Field Name you wish to increase the size of. Use the "+" icon to add a new field.
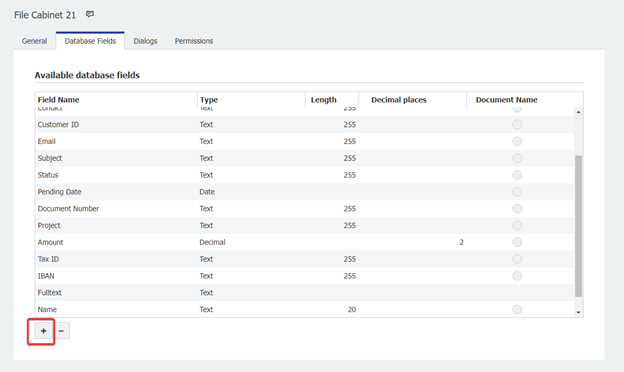
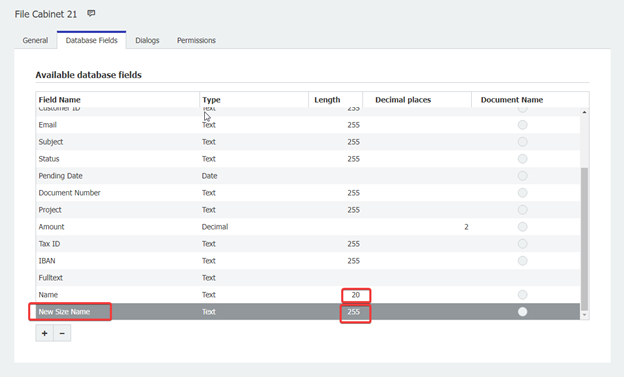
2. Create a new field that will replace the old field that we want to change the size of. Set its size accordingly.
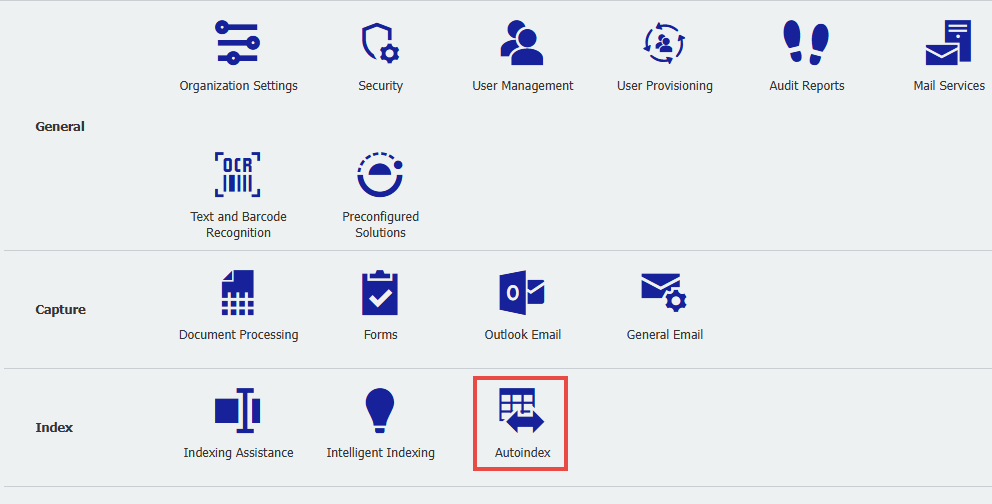
3. Go to Configurations and click on the Autoindex plugin.
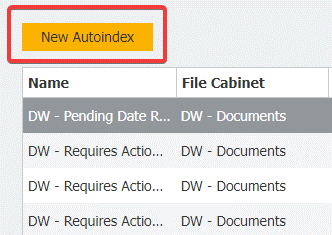
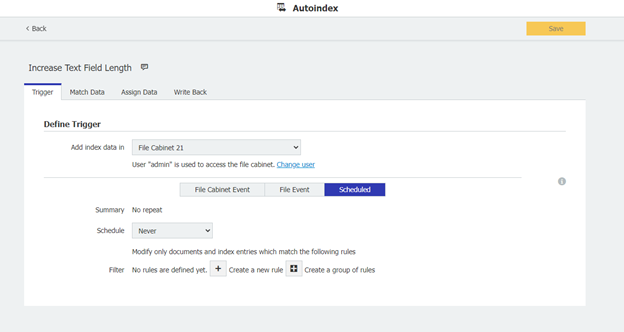
4. Create a new Autoindex job. For this demonstration the job was named "Increase Text Field Length".
Under Define Trigger section, select the name of the File Cabinet with the field you want to change. Open the Scheduled menu and ensure "Never" is selected, as this job will only need to run once.
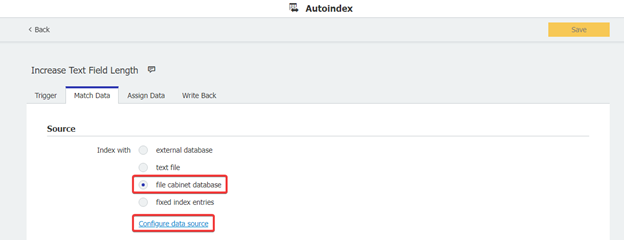
5. Click on the Match Data tab and select "file cabinet database" then select "Configure data source"
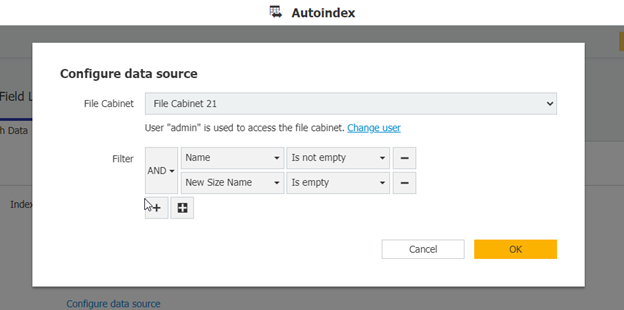
6. Select the File Cabinet we are currently working with. For the filter, click the "+" icon and select the Original field that you wish to increase the size of.
Set the filter with the following condition: Original field = "Is not empty" and the newly configured field = "Is empty". Be sure to use the AND filter for the configuration.
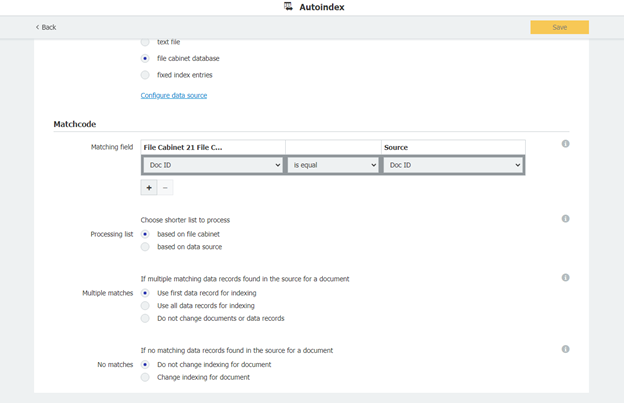
7. Under Matchcode, select Doc ID from the dropdown, set the condition to "is equal" and set the Source to Doc ID as well.
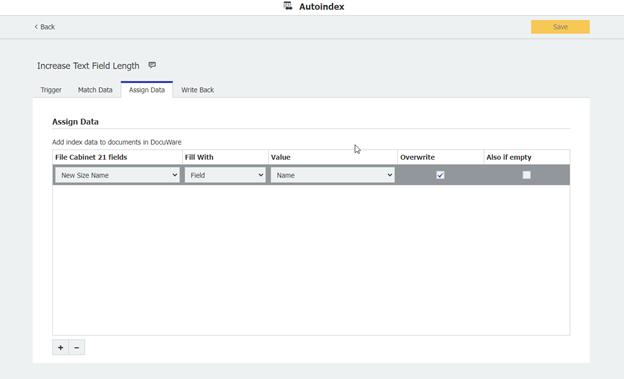
8. In the Assign Data tab, click the "+" at the bottom. In the first column, select the newly created field. In the Fill with column, select "Field" and for the Value column, select the original field from the dropdown.
Once completed, click "Save" in the top right and navigate back to the Autoindex landing page.
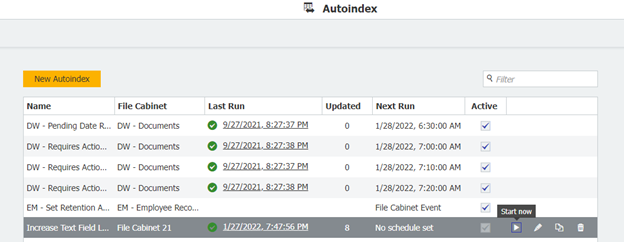
9. You should now see your newly created Autoindex job. Click the play button next to your job to start it.
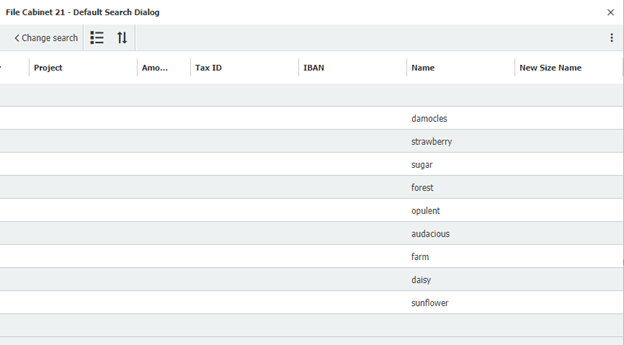
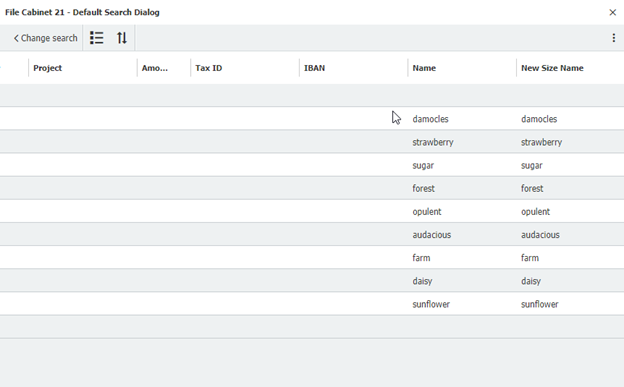
10. After running the Autoindex job, the New Size Name field has the same values as the Name field.
Before:
After:
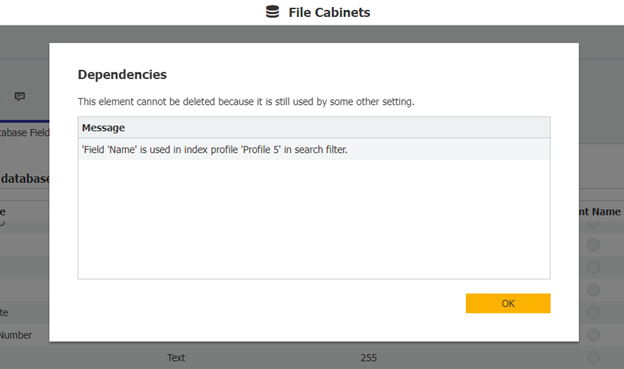
11. Now, delete the original field after ensuring the following considerations are addressed.
2. Create a new field that will replace the old field that we want to change the size of. Set its size accordingly.
3. Go to Configurations and click on the Autoindex plugin.
4. Create a new Autoindex job. For this demonstration the job was named "Increase Text Field Length".
Under Define Trigger section, select the name of the File Cabinet with the field you want to change. Open the Scheduled menu and ensure "Never" is selected, as this job will only need to run once.
5. Click on the Match Data tab and select "file cabinet database" then select "Configure data source"
6. Select the File Cabinet we are currently working with. For the filter, click the "+" icon and select the Original field that you wish to increase the size of.
Set the filter with the following condition: Original field = "Is not empty" and the newly configured field = "Is empty". Be sure to use the AND filter for the configuration.
7. Under Matchcode, select Doc ID from the dropdown, set the condition to "is equal" and set the Source to Doc ID as well.
8. In the Assign Data tab, click the "+" at the bottom. In the first column, select the newly created field. In the Fill with column, select "Field" and for the Value column, select the original field from the dropdown.
Once completed, click "Save" in the top right and navigate back to the Autoindex landing page.
9. You should now see your newly created Autoindex job. Click the play button next to your job to start it.
10. After running the Autoindex job, the New Size Name field has the same values as the Name field.
Before:
After:
11. Now, delete the original field after ensuring the following considerations are addressed.
- The original field might have been populated by automated methods including, but not limited to:
- Autoindex jobs
- DocuWare Desktop Configurations(Import, Printer, Scan, Connect to Outlook, etc)
- Connect to Mail
- Predefined Entries in a store dialog - If the original field was utilized for Intelligent Indexing, you will need to update your field mappings and retrain your documents.
- There may be other considerations not covered in this document. Please consult with the party, who implemented the system, before carrying out this operation.
- You will need to update these to point to the New Field before deleting the original field. In most cases, you will receive a warning if you try to delete the original field first (see below screenshot).
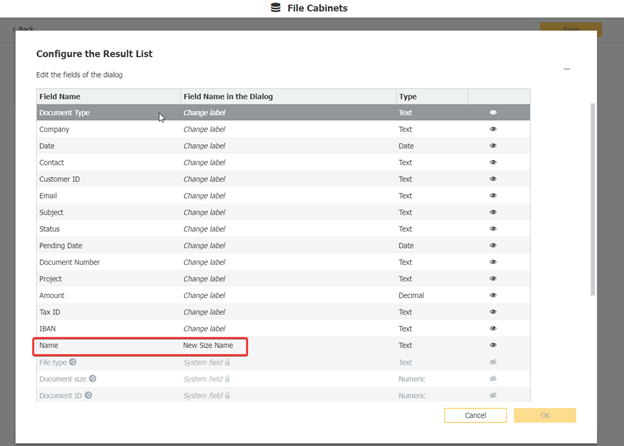
12. Once you change the new field's name to match the original deleted field name, go into all the dialogs for this File Cabinet and change its Field Name in the Dialog column to match.
KBA is applicable for both On-premise and Cloud Organizations.