

Pregunta:
¿Cómo se crea un sello con selector de fecha?
Solución:
Consulte la siguiente guía para crear, diseñar y configurar un Sello con Selector de Fecha:
1. Para crear un sello con selector de fecha, acceda a la página "Configuraciones" a través del desplegable situado junto al nombre de usuario en el Cliente web.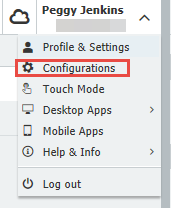
2. Seleccione el plugin "Sellos".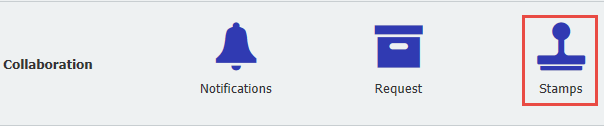
3. Una vez en la página de inicio, selecciona "Sellonuevo" y, a continuación, "Sello de texto".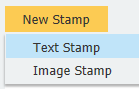
4. En la pestaña Diseñador, marque la casilla de nombre de usuario para una entrada predefinida situada bajo la configuración del sello y, a continuación, seleccioneAñadir entrada de usuario.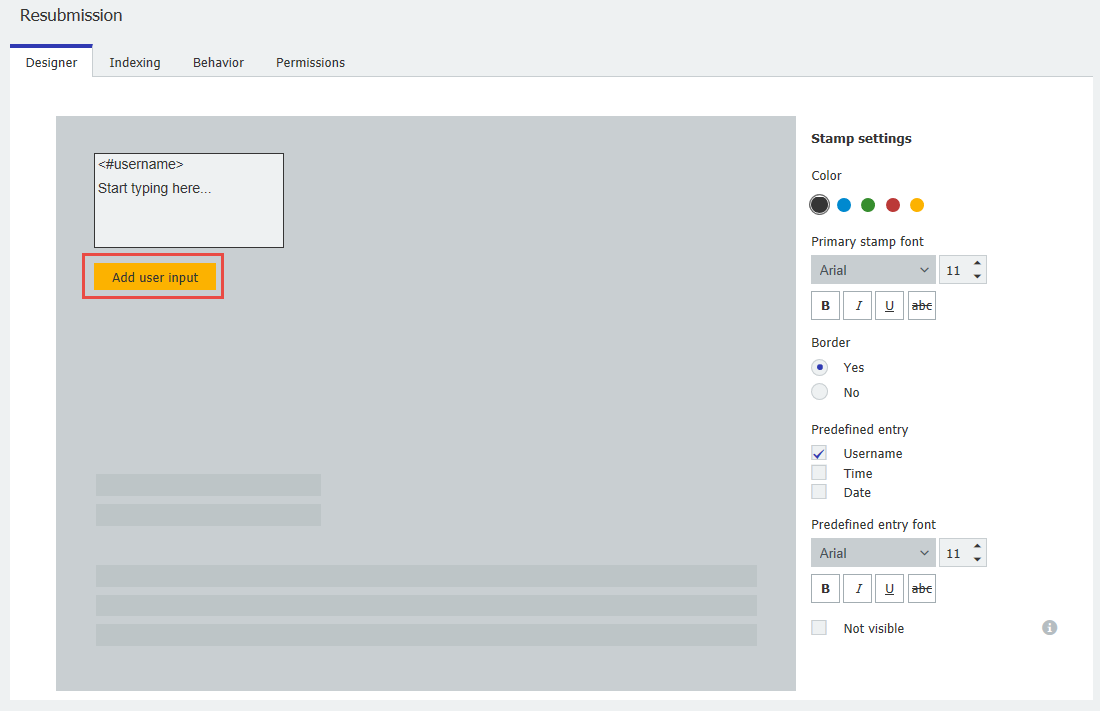
5. Introduce "Fecha" en la etiqueta del campo, y bajo el tipo de campo, selecciona "Texto."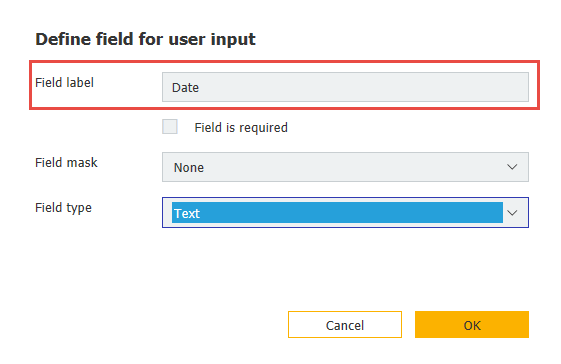
6. En la pestaña "Indexación", seleccione en primer lugar la ubicación del documento a la que se puede aplicar este sello. A continuación, defina las entradas de campo de la base de datos que se actualizarán una vez aplicado el sello.
Después, seleccione el archivador donde se encuentran estos campos.
Utiliza el símbolo "+" para añadir campos de índice del archivador que hayas seleccionado. Elige una entrada de base de datos de fecha para este sello en el desplegable "Campo" y, a continuación, selecciona "Usuario" en el desplegable "Rellenar con".
(Nota: Asegúrese de que ha creado un campo de base de datos "Fecha" dentro del archivador que ha seleccionado, si no es así, cree uno en el plugin Archivadores)
7. En la pestañaComportamiento, puede elegir qué sucede después de aplicar el sello al documento.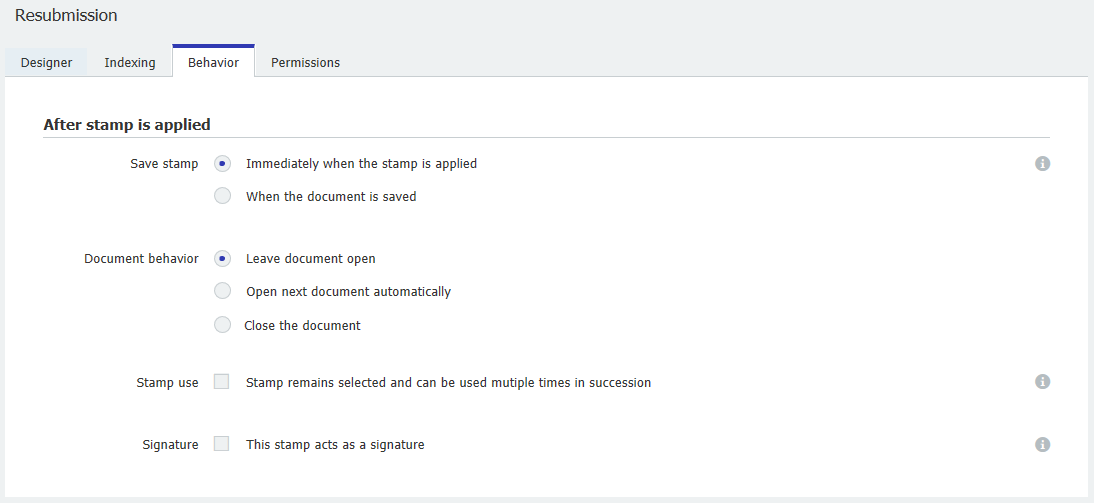
8. En la pestaña Permisos, tiene la opción de establecer una contraseña que debe introducirse antes de aplicar el sello. A continuación, haciendo clic en el símbolo "+", puede añadir usuarios para que tengan permiso para utilizar este sello. 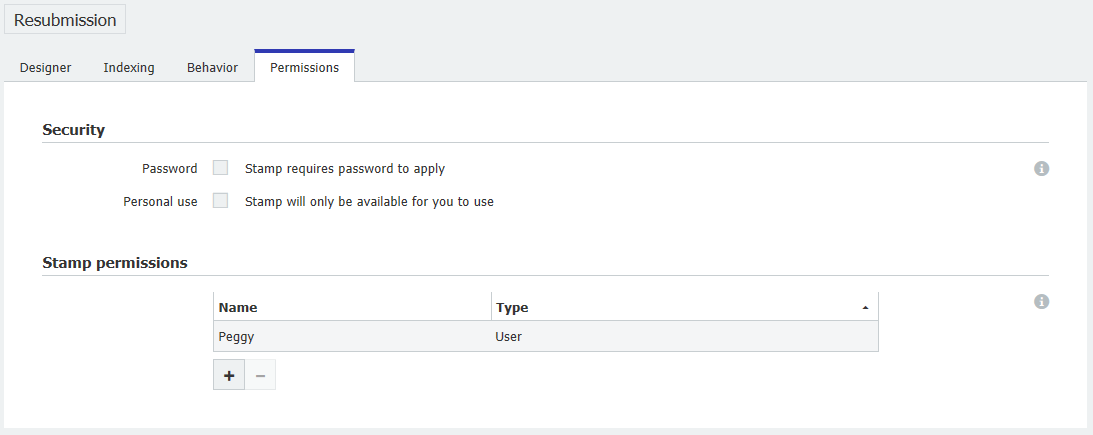
Una vez completado, vaya al Cliente Web y actualice la página. Ahora verá su nuevo Sello Seleccionador de Fechas disponible para su uso.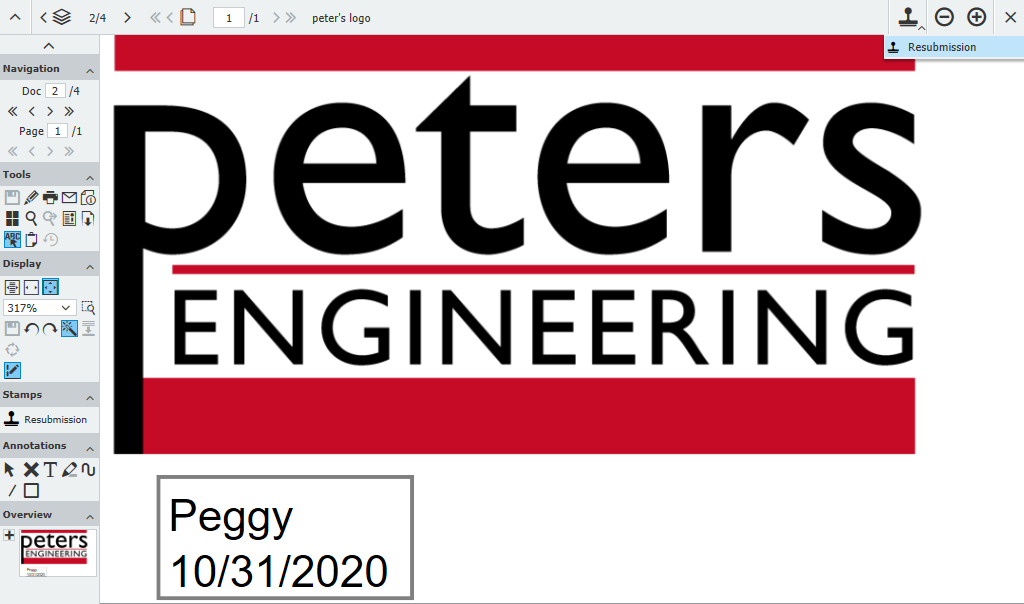
KBA es aplicable tanto para organizaciones en la nube como locales.
Tenga en cuenta: Este artículo es una traducción del idioma inglés. La información contenida en este artículo se basa en la(s) versión(es) original(es) del producto(s) en inglés. Puede haber errores menores, como en la gramática utilizada en la versión traducida de nuestros artículos. Si bien no podemos garantizar la exactitud completa de la traducción, en la mayoría de los casos, encontrará que es lo suficientemente informativa. En caso de duda, vuelva a la versión en inglés de este artículo.