

I would like to set up a new secure connection using Modern Authentication between DocuWare and an Office 365 mail account.
Alternatively, I would like to replace my old Connect to Mail configurations with the discontinued Exchange Web Services by switching to Graph API
EWS Note
Microsoft is ending support for Exchange Web Services (EWS) in Exchange Online. As currently planned (May 2025), EWS will be blocked by default from 1 October 2026. The complete and final global shutdown of all EWS requests will then take place on 1 April 2027.
Of course, it is possible that Microsoft may change the schedule again. Nevertheless, DocuWare Connect to Mail customers should switch to the Graph API right away.
For DocuWare Cloud Customers
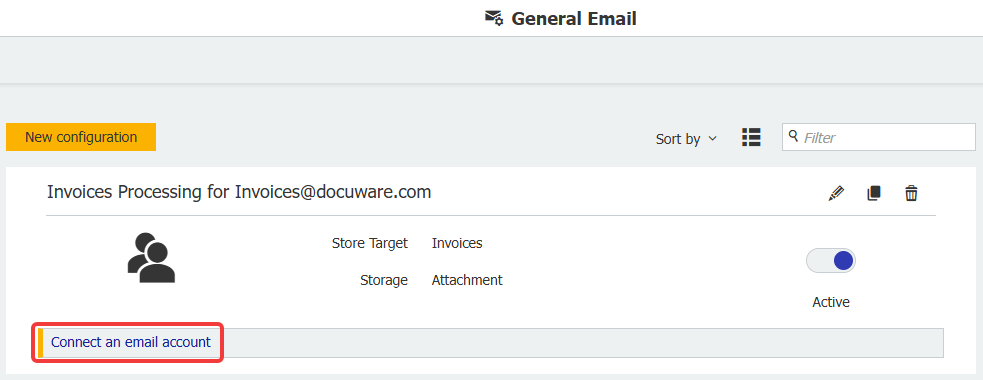
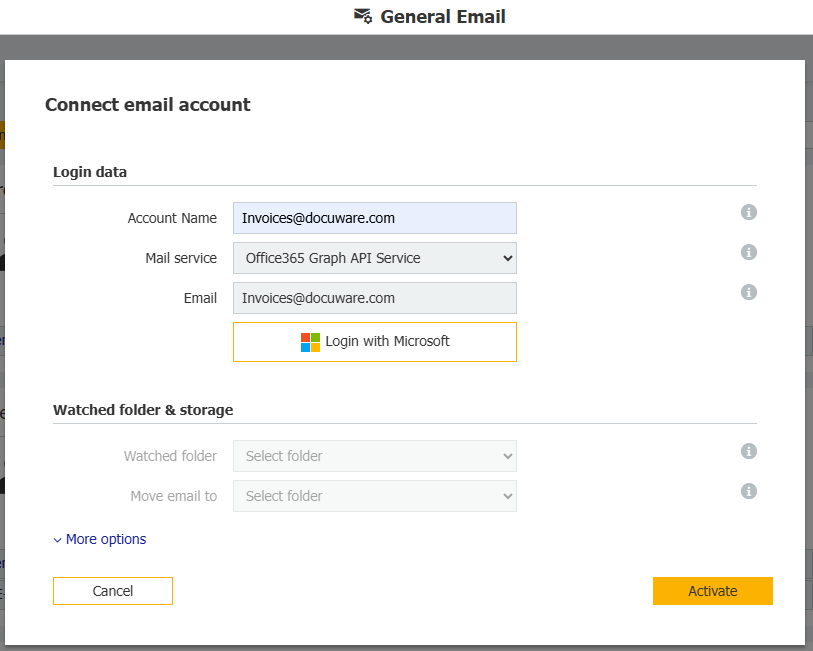
There is no need to create a Mail Service configuration since we already deliver everything for connecting to your Office 365 mail account with Graph API and OAuth2.0. Go to your “General Email” Configuration and connect directly with your Office 365 account by selecting the “Exchange Online Graph API” Mail Service.
- Click on "Connect an email account" or click the ‘Edit’ button on an existing configuration
- When selecting the new Mail Service "Exchange Online Graph API" you can click on "Login with Microsoft".
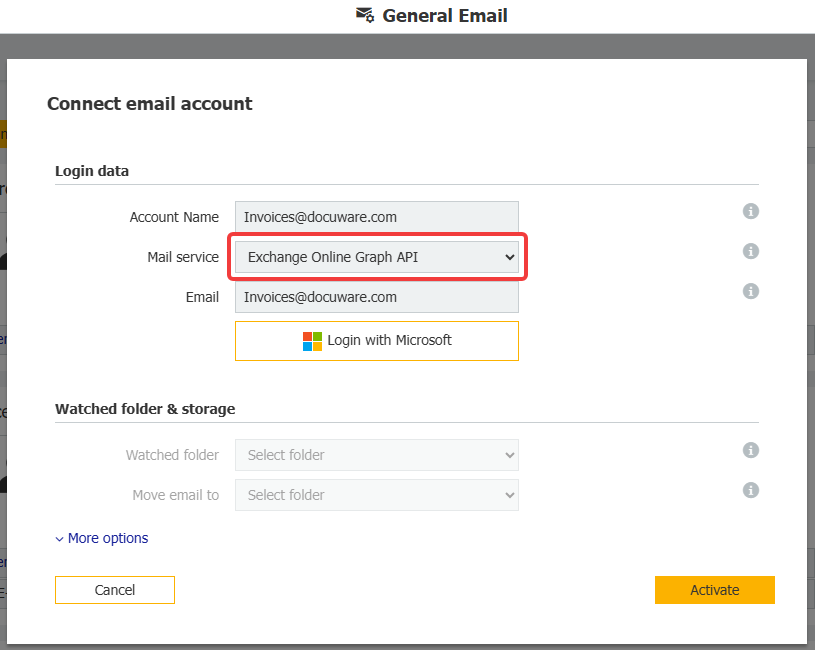
- Follow the instructions in the pop-up window to complete the setup.
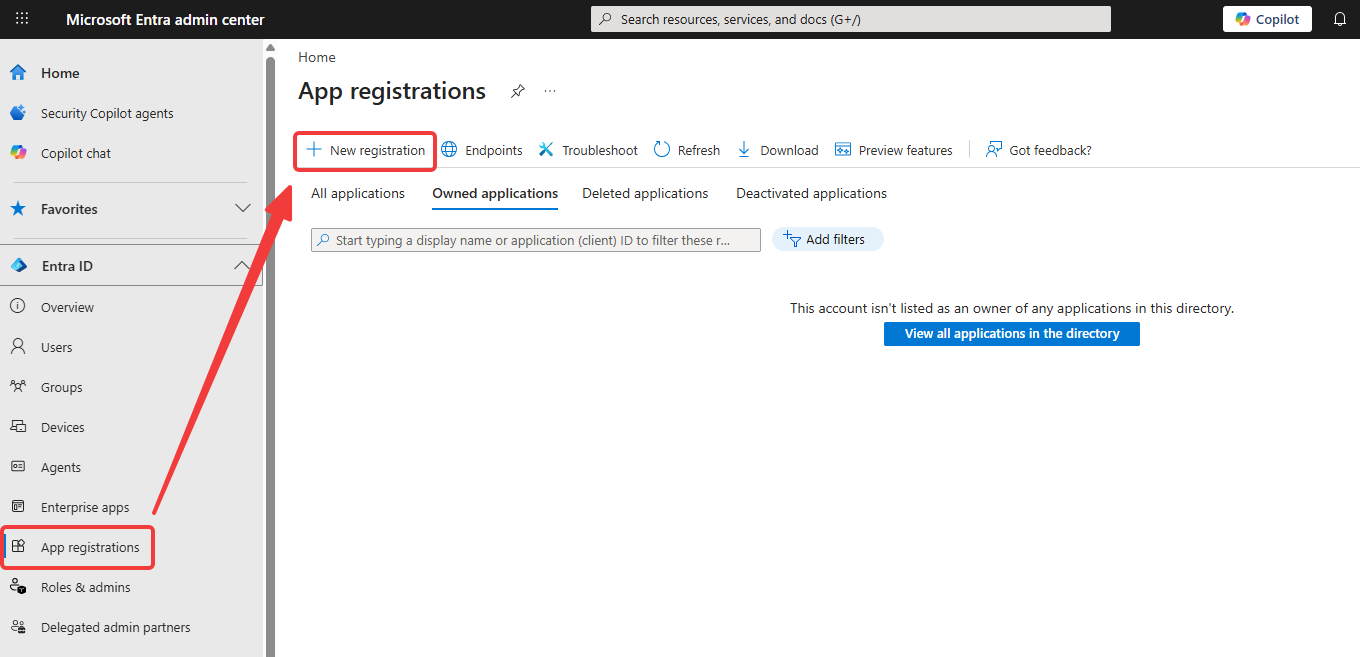
For DocuWare OnPremise Customers, and if you’d rather have control over the EntraID app yourself
- Please go to your Microsoft Entra Admin Center and select "App registrations". Next, click on "New registration".
-
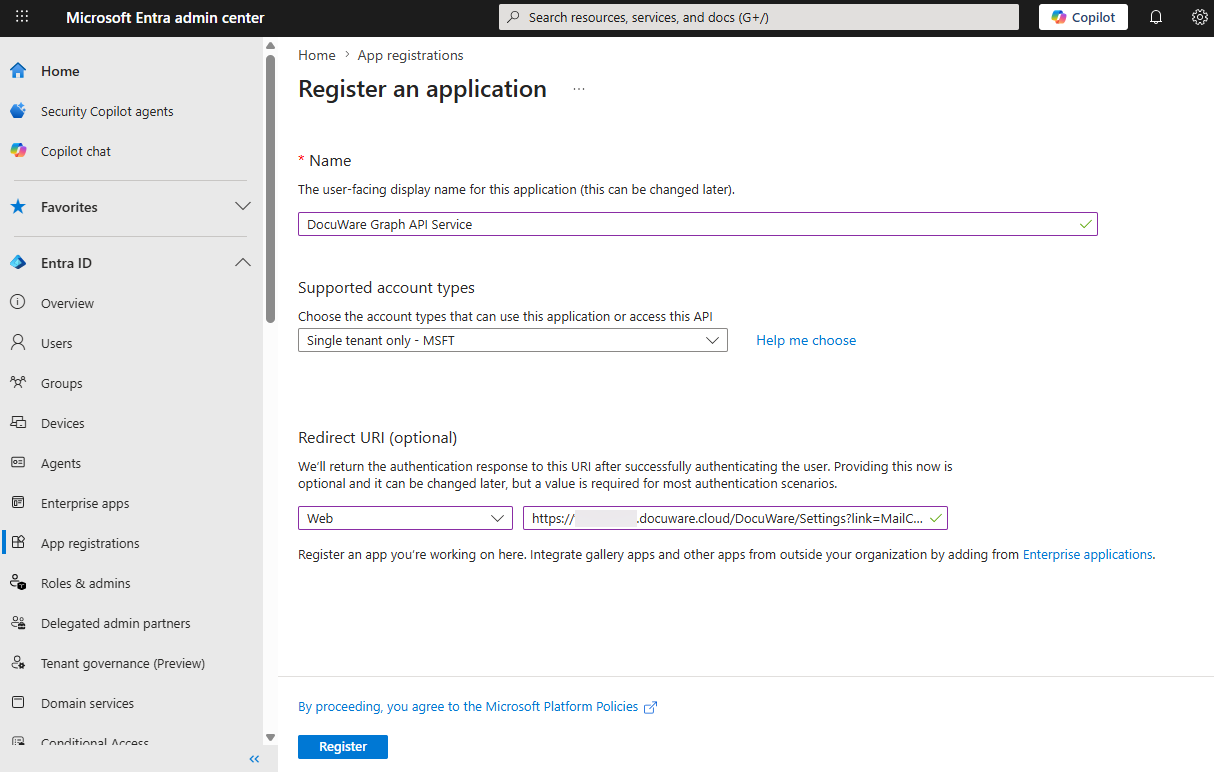
Choose a descriptive name for the app and enter a Web-type redirect URI.
The redirect URI consists of the DocuWare URL followed by "/DocuWare/Settings?link=MailCapture".For example: https://your-dw-cloud-name.docuware.cloud/DocuWare/Settings?link=MailCapture
-
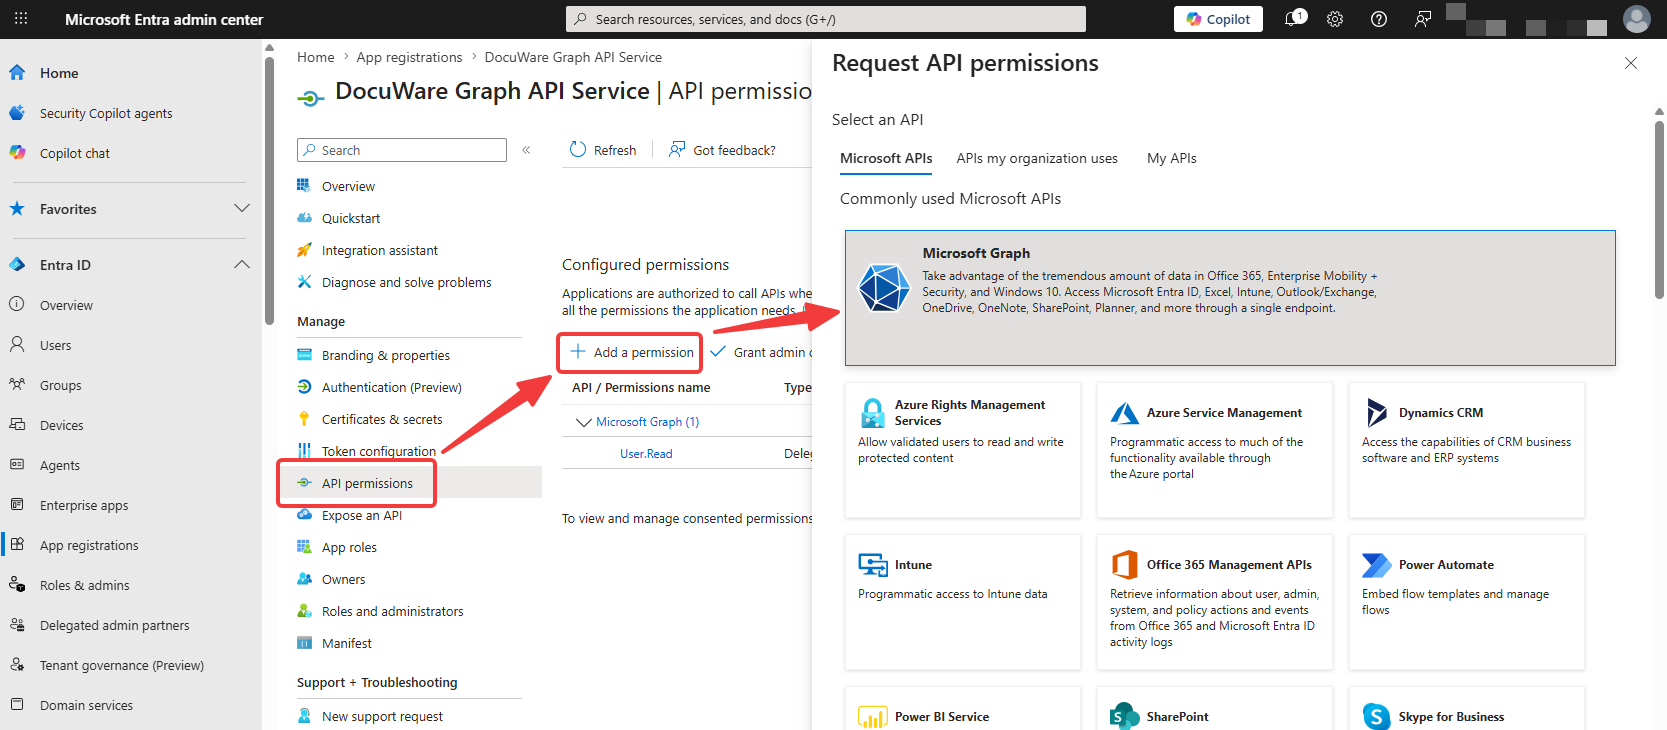
In the newly created app, go to API Permissions and then click "Add Permissions". Under the Microsoft APIs tab, select "Microsoft Graph".
-
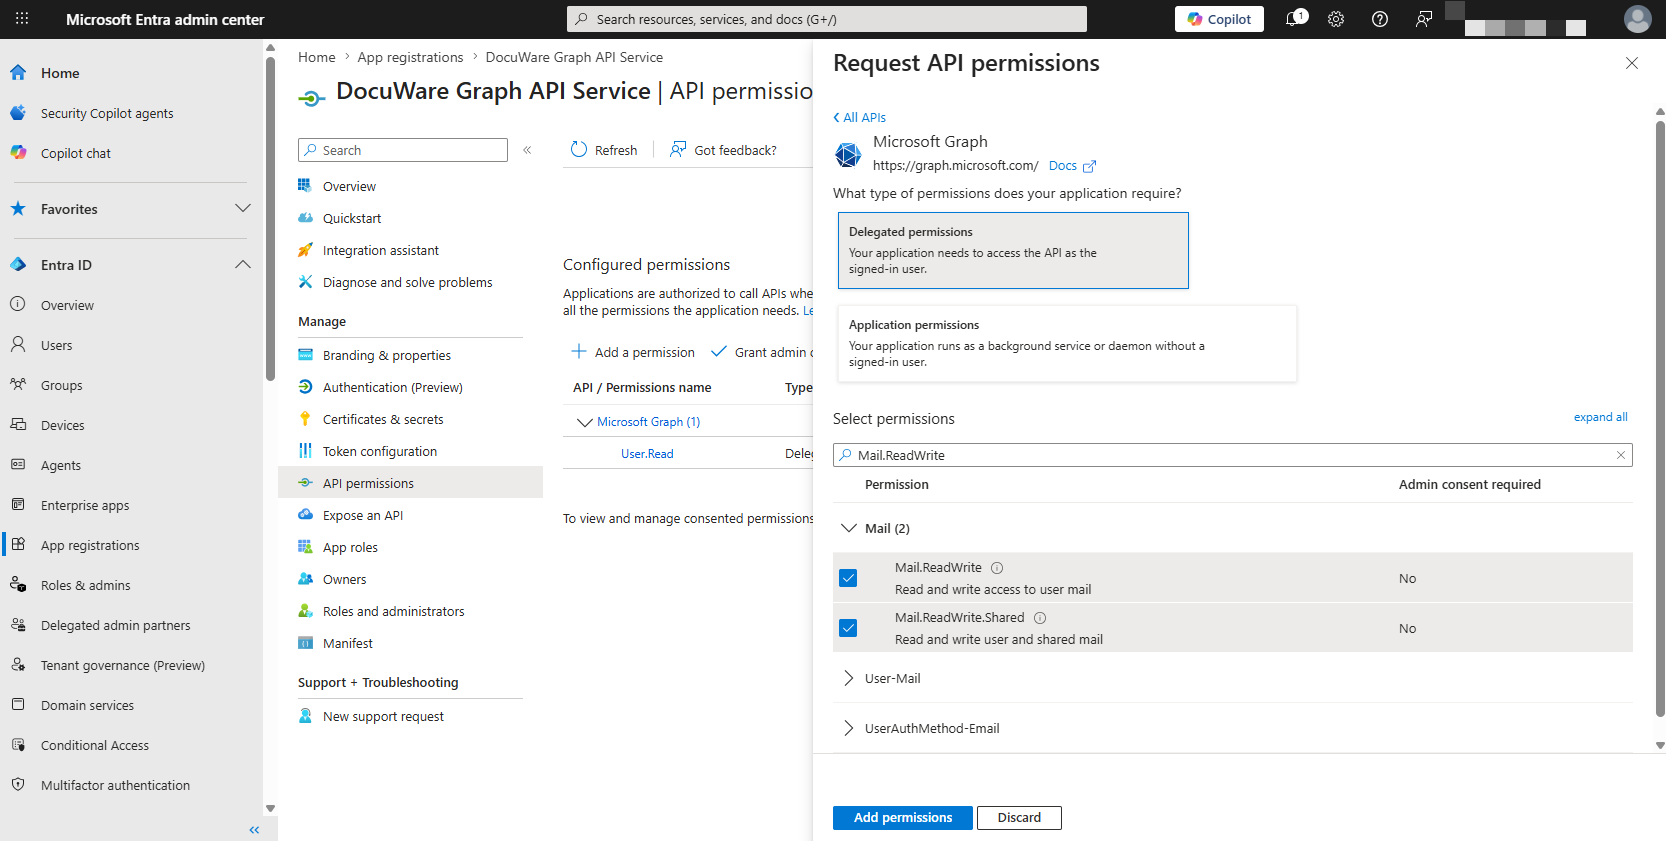
On the next window, choose "Delegated permissions" We require the following delegated Microsoft Graph permissions:
- offline_access
- openid
- Mail.ReadWrite
- Mail.ReadWrite.Shared (optional for shared mailboxes)
Once you have selected all the permissions, click on "Add permissions" to confirm your selection.
-
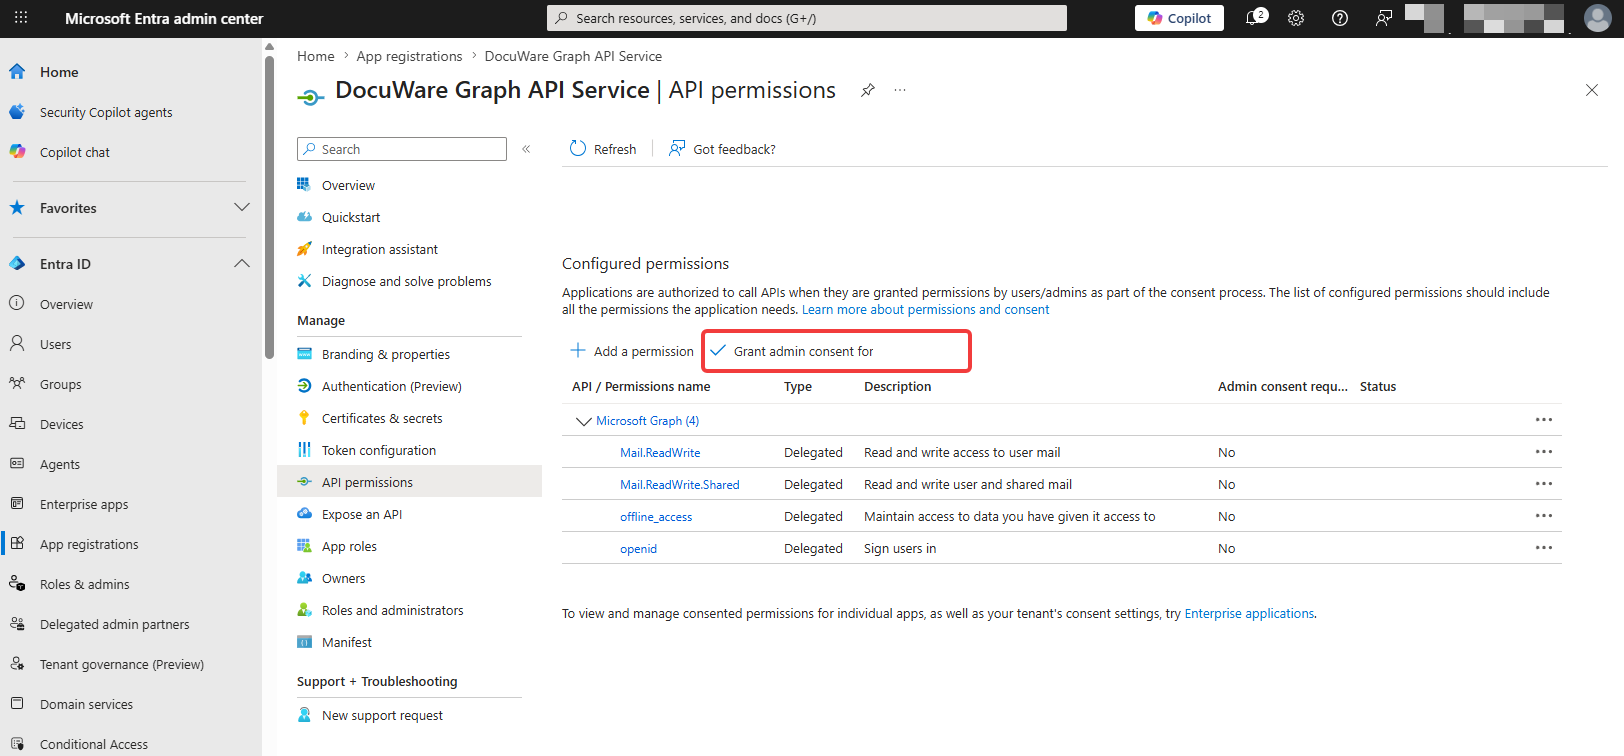
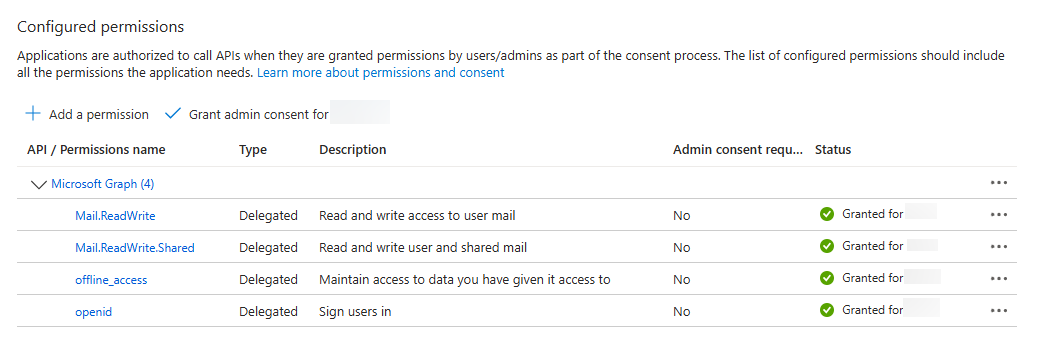
Next, please grant Admin consent for the app and all permissions.
-
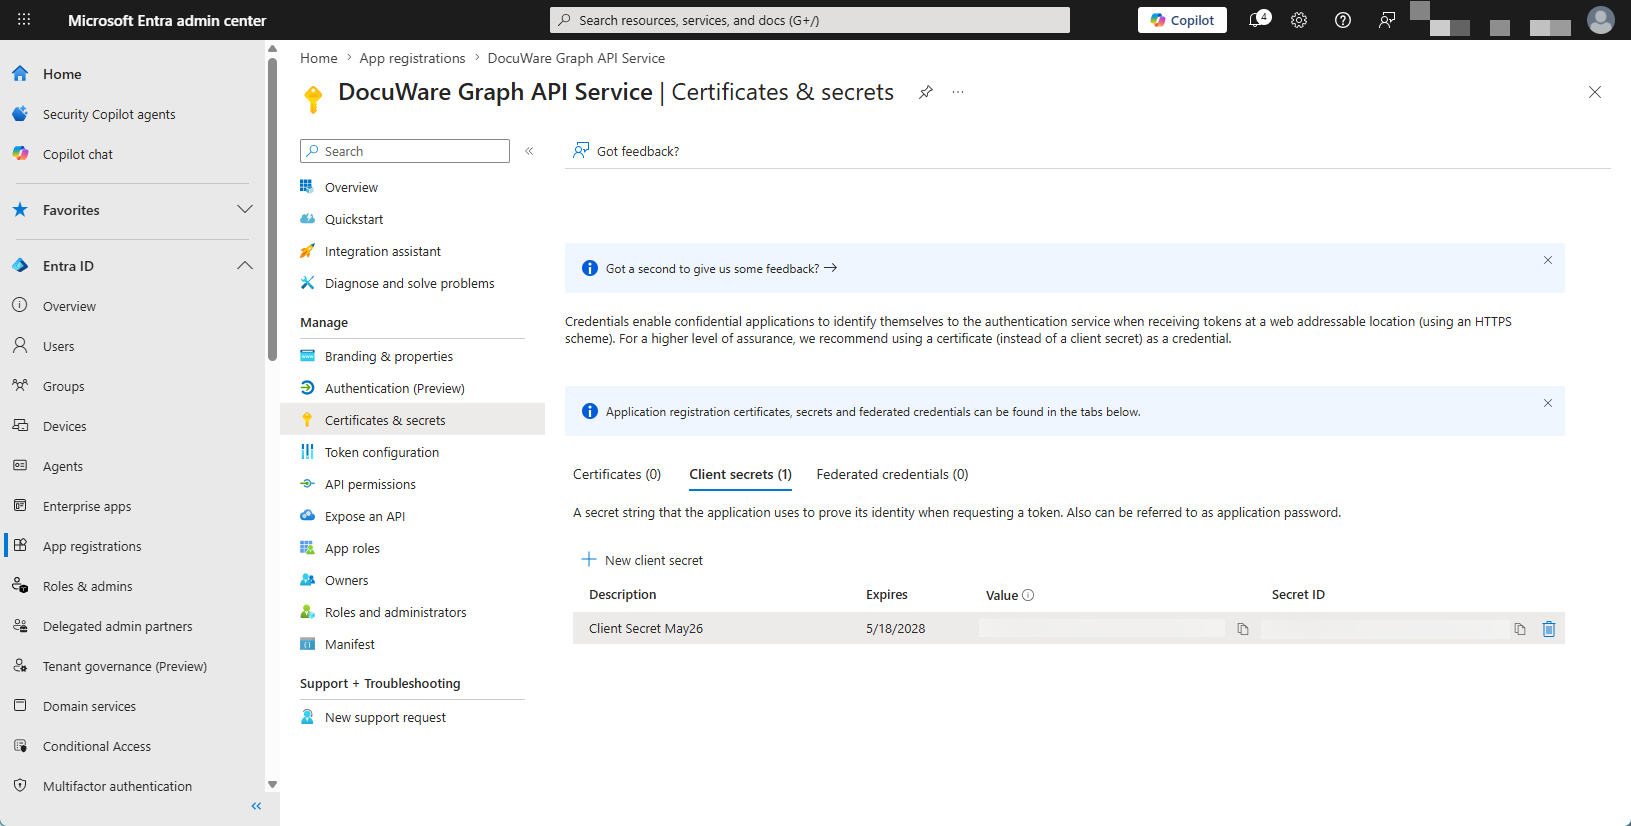
You can now create a client secret key for the app. To do this, go to the "Certificates & secrets" sub-section and select "New client secret". Choose a description for the client secret and set an expiry date. We recommend the maximum duration of 730 days. Copy the value for configuration in DocuWare. We only need the value, not the Secret ID.
-
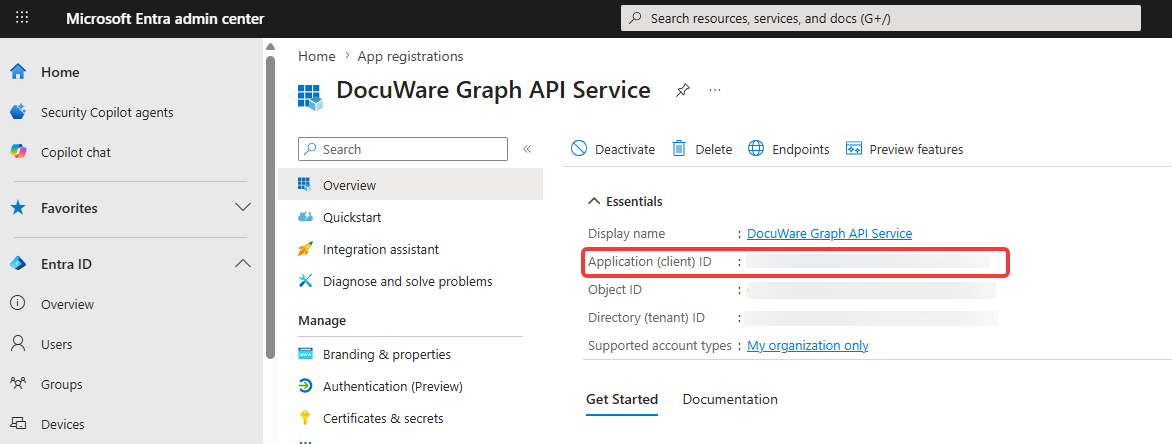
The app now has an up-to-date client secret and has been granted the necessary permissions. You can now gather the information you need to set up the mail service in DocuWare. Return to the app overview and make a note of the app’s Application ID.
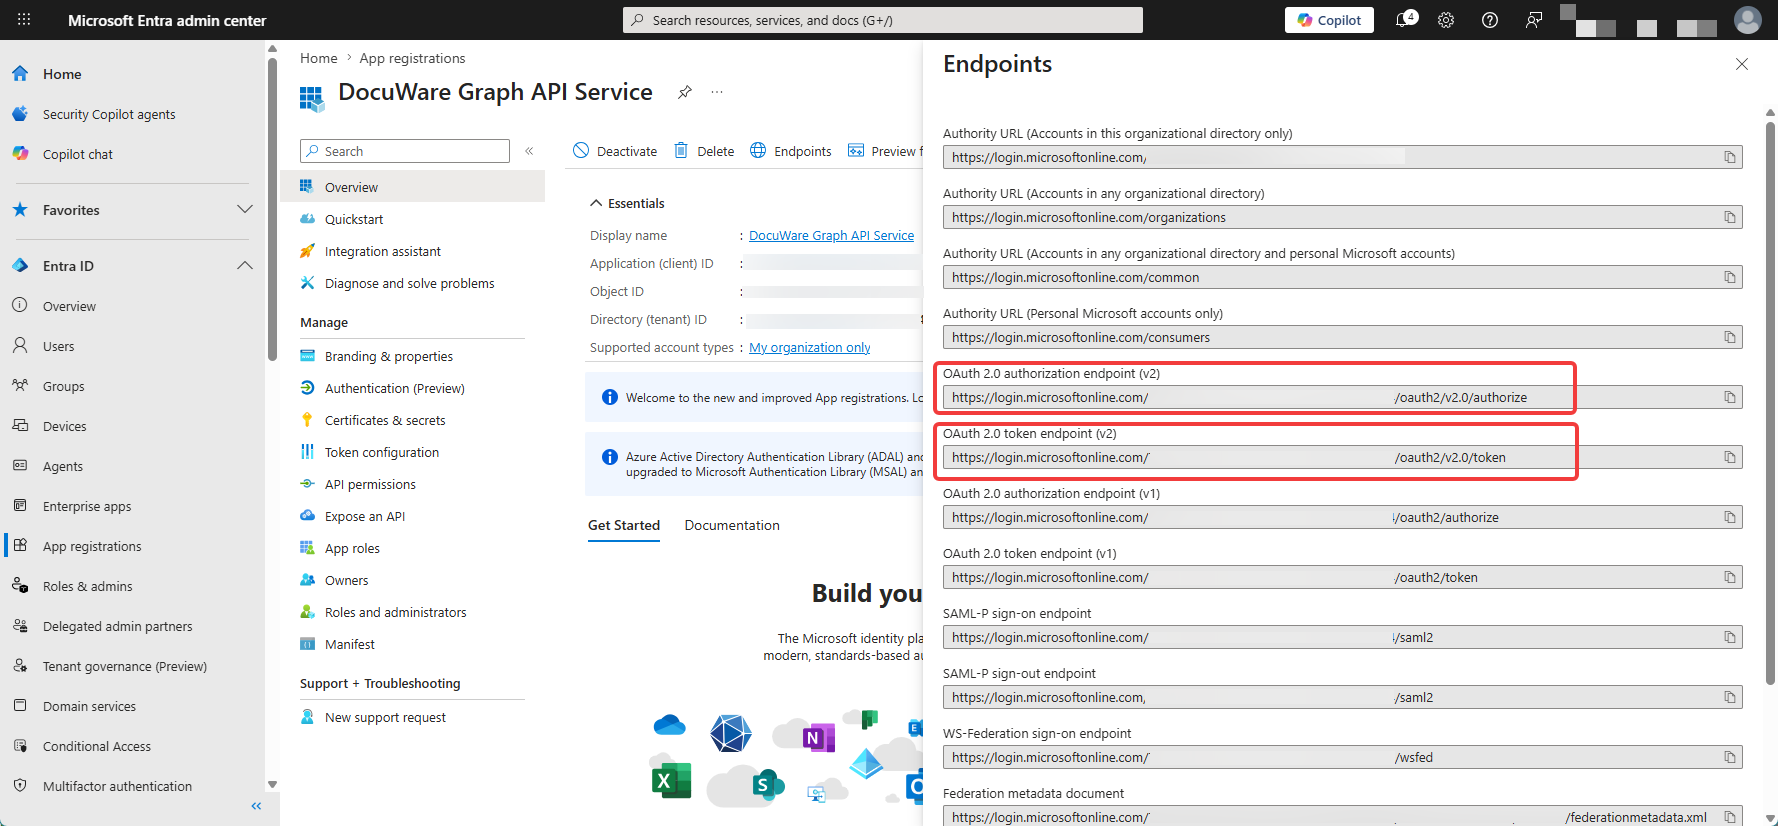
Then select the "Endpoints" option. We need the following endpoints from the list:
- OAuth 2.0 authorisation endpoint (v2)
- OAuth 2.0 token endpoint (v2)
-
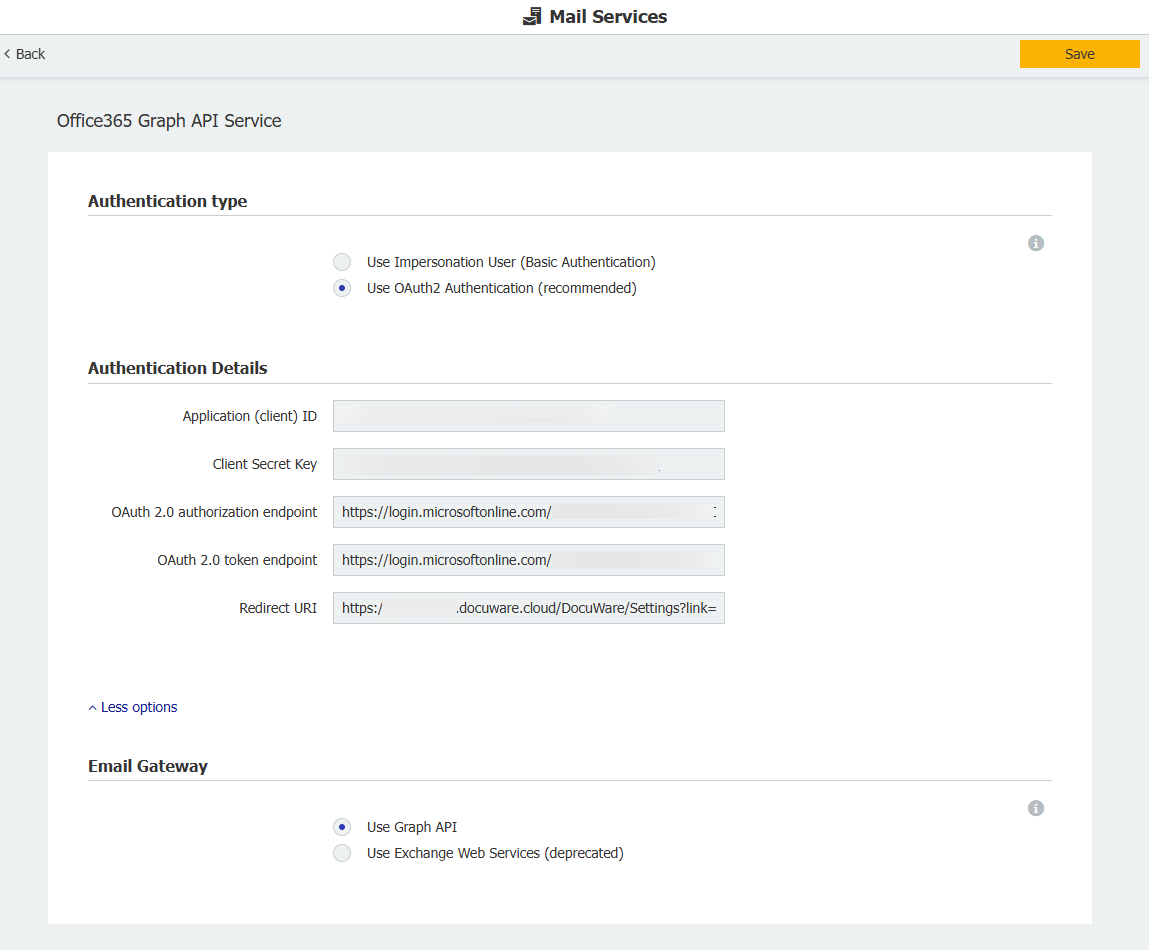
You can now go to the DocuWare configuration page and open the "Mail Services" section. Click on "New mail service" and select "Exchange". In the top-left corner, you can give the mail service a suitable name.
Then enter the values you noted down earlier into the configuration and save it.
-
Go back to the Configuration Page and switch to the General Email/Connect to Mail section. Create a new storage configuration or use an existing one, then select the "Connect an email account" option.
-
In the new window, select the mail service you have just created, enter the details and click on "Log in with Microsoft".
If this is a user mailbox, select the same account in the pop-up window and log in.
If this is a shared mailbox, you will need a user with delegated full access permission to this shared mailbox. Enter this user’s credentials in place of the shared mailbox details.
Once you have logged in successfully, you can select the folders. To finish, click on Activate.