

Question:
How can I configure Email Notifications since version 7?
Answer:
In order to create an Email Notification, please do the following:
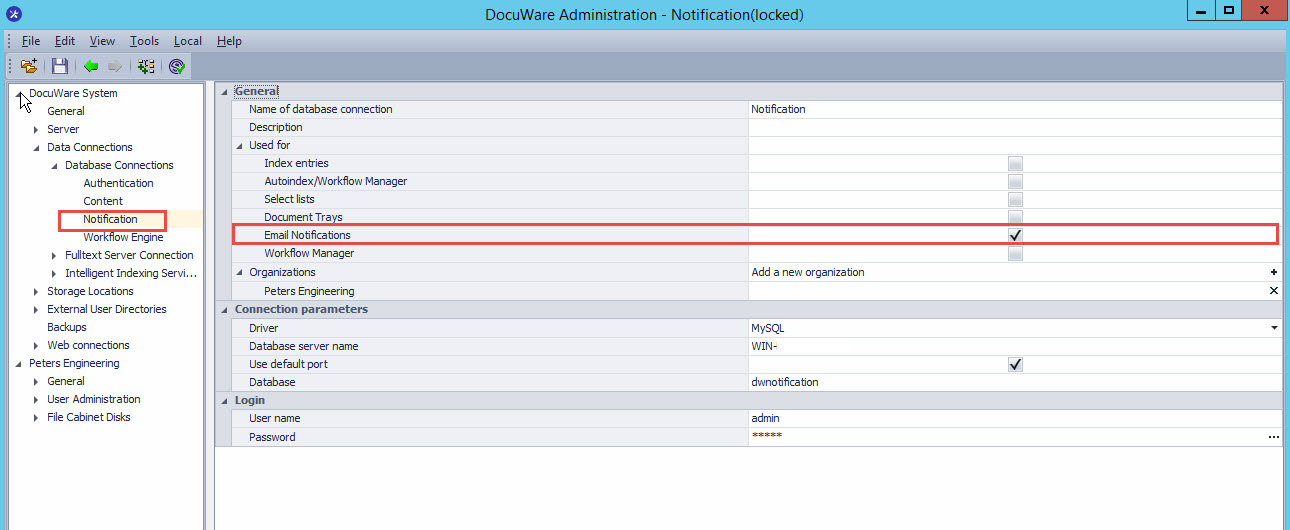
- Make sure you have a Notification Server Database Connection and that it is enabled to be used for Email Notifications. (Applicable for On-premise systems)
- Create an SMTP Connection. Please refer to this article on how to do so: How to Create an SMTP Connection 7+
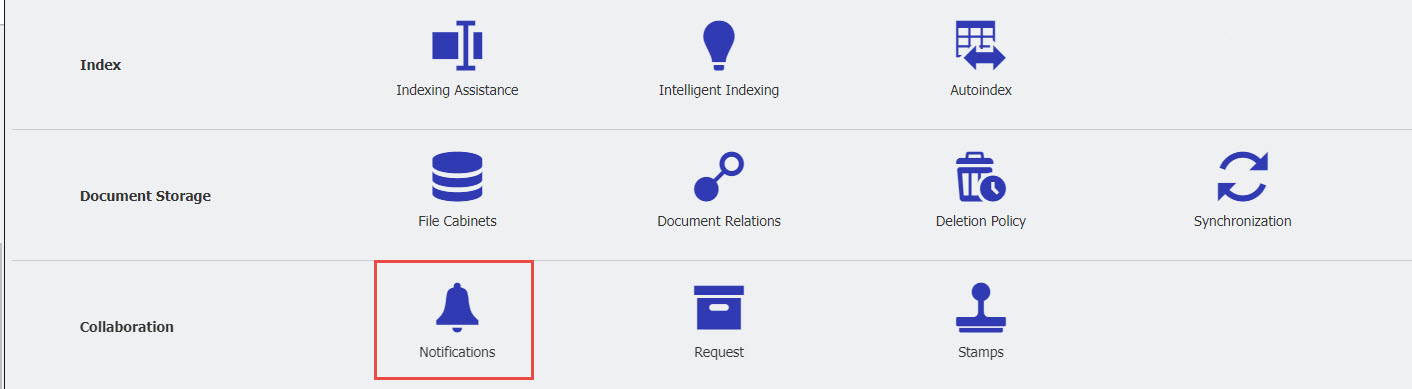
- Go to the Configurations page, and select the Notifications plugin.
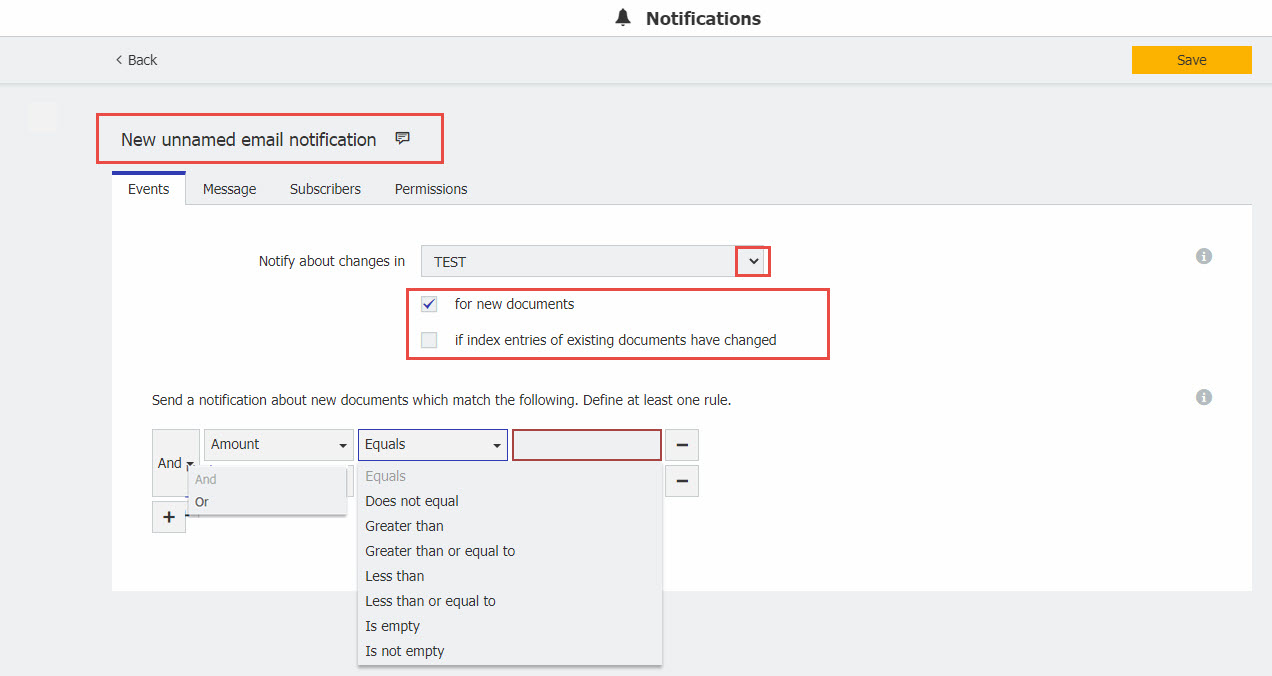
- From the Events tab, establish what file cabinet the notification should monitor, as well as what documents will trigger the notification by specifying index entries the configuration should look for. Choose to have the job run on "New Documents" or "if index entries of existing documents have changed" to meet the trigger criteria.
Note: You do not want to set up a configuration with both options checked, as this will create a continuous loop that unnecessarily triggers the job over and over again.
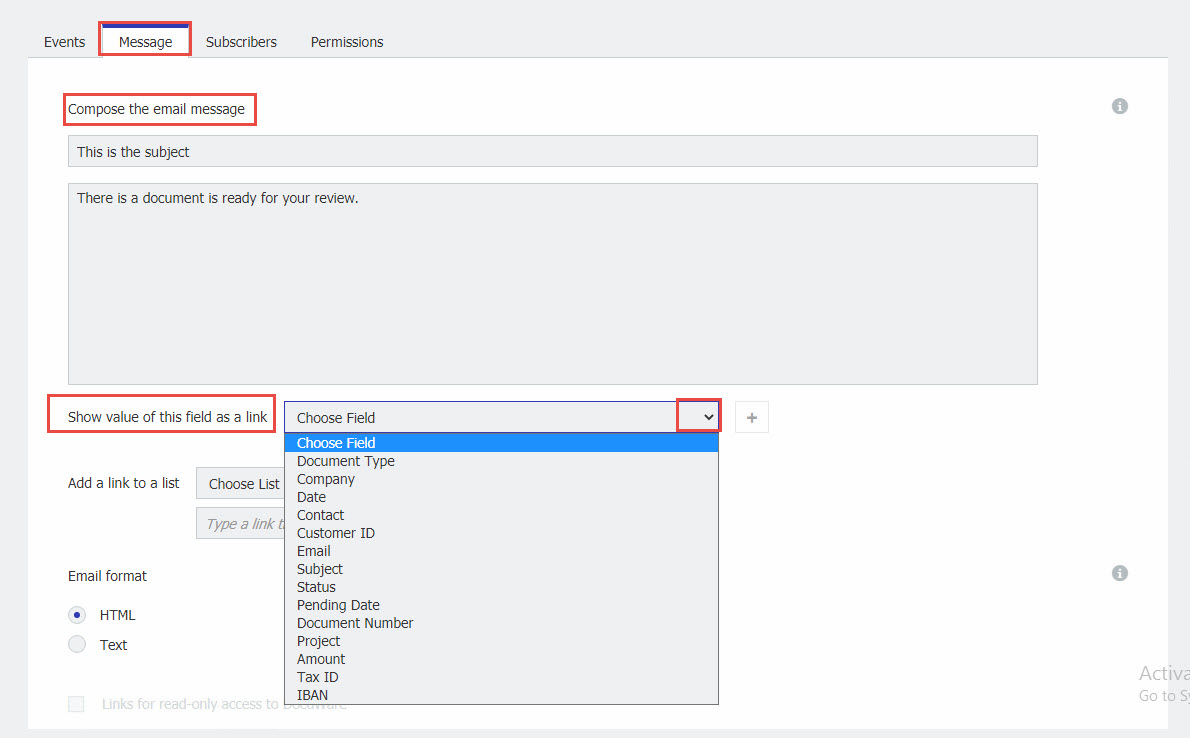
- Under the Message tab, compose the email users should receive. Customize the email's subject and body and specify a field value to be used as the link to the document.
- You can also have the email link directly to a task list. Please refer to this article for more information on how to configure Tasklist Notifications.
- At the bottom of the Events tab, configure whether the notification is sent as HTML or a text email. In text format, the link to the document or list is not clickable. It is only included as text that must be copied into the browser. You can also enable the "Links for read-only access to DocuWare" option in the event that the recipients are users of the Read Only DocuWare Web Client. The link can be generated in this way.

- The Subscribers tab is used to specify the users who should be receiving this email notification. You can choose to add a recipient via username or index field and set the notification to be sent out on a custom schedule (the interval can't be set lower than 10 minutes).
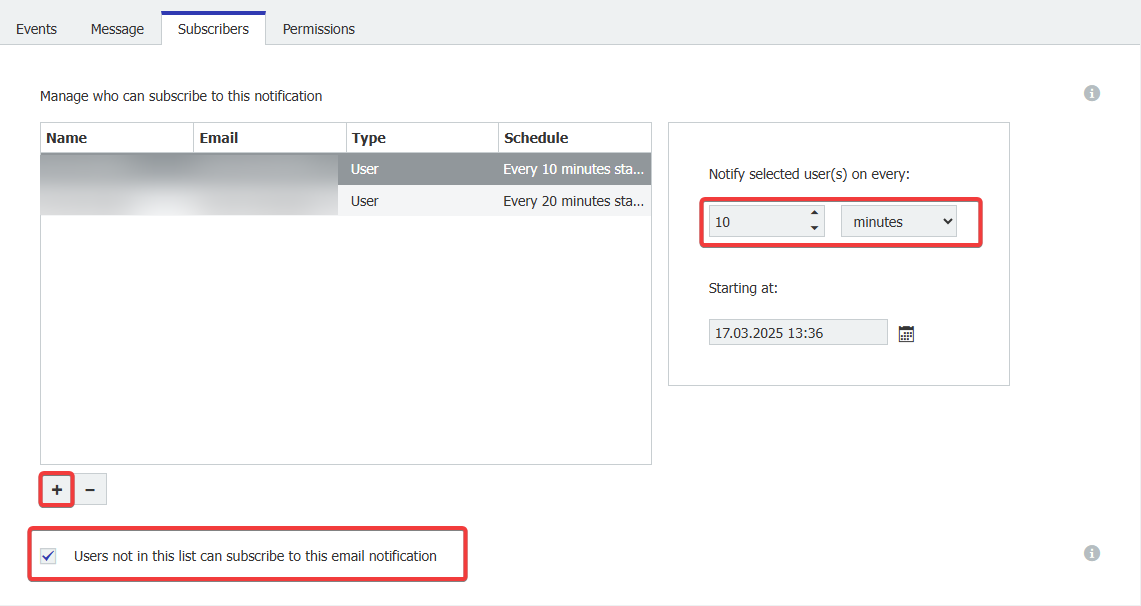
Note: When choosing "Users not in this list can subscribe to this email notification" every user in your organization can subscribe to the notification and define the scheduling themselves.
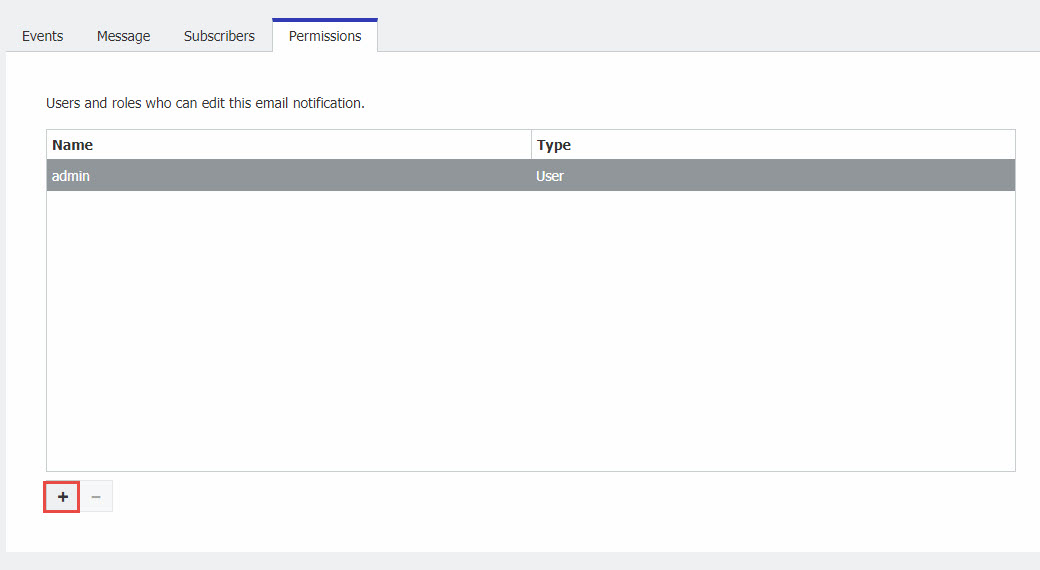
- The Permissions tab allows you to choose the user(s) who can modify this configuration. All users listed here, directly or through a role, may change the notification settings or delete the notification completely.
- Finally, save the configuration, and your Notification will be active.
KBA is applicable for both Cloud and On-premise Organizations.