

Scenario:
We have accidentally altered the index entries of multiple documents via Autoindex. How can we restore the previous index entries?
We have accidentally altered the index entries of multiple documents via Autoindex. How can we restore the previous index entries?
Solution:
When this issue occurs, the Audit Reports configuration can be used to identify these previous entries. Once identified, an Autoindex job can be created to restore these values;
(Note: Only applicable if Audit logging is enabled for the affected file cabinet. Additionally, please take a full backup for your DWData database.)
(Note: Only applicable if Audit logging is enabled for the affected file cabinet. Additionally, please take a full backup for your DWData database.)
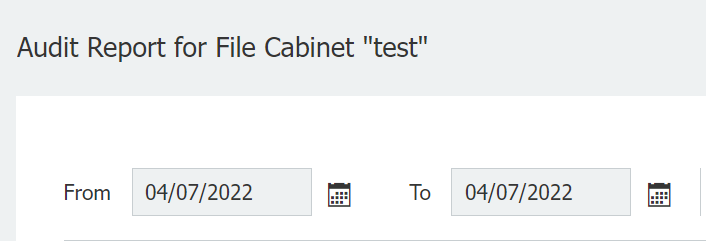
1. Navigate to the Audit Reports plugin located on the Configurations page. Locate and select the file cabinet where the documents were altered, then execute a search on the date the documents were changed.

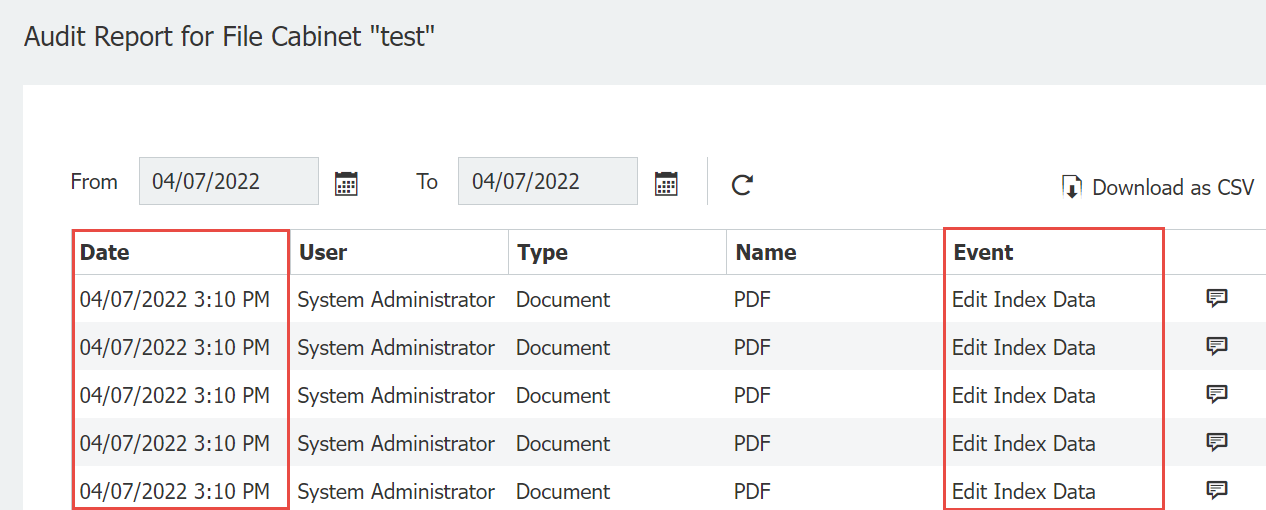
2. Once the search has returned the results, use the date and time column to better identify when the alteration occurred. When indexes of a document are changed, they will be given an "Edit Index Data" entry within the Events column of the audit report.
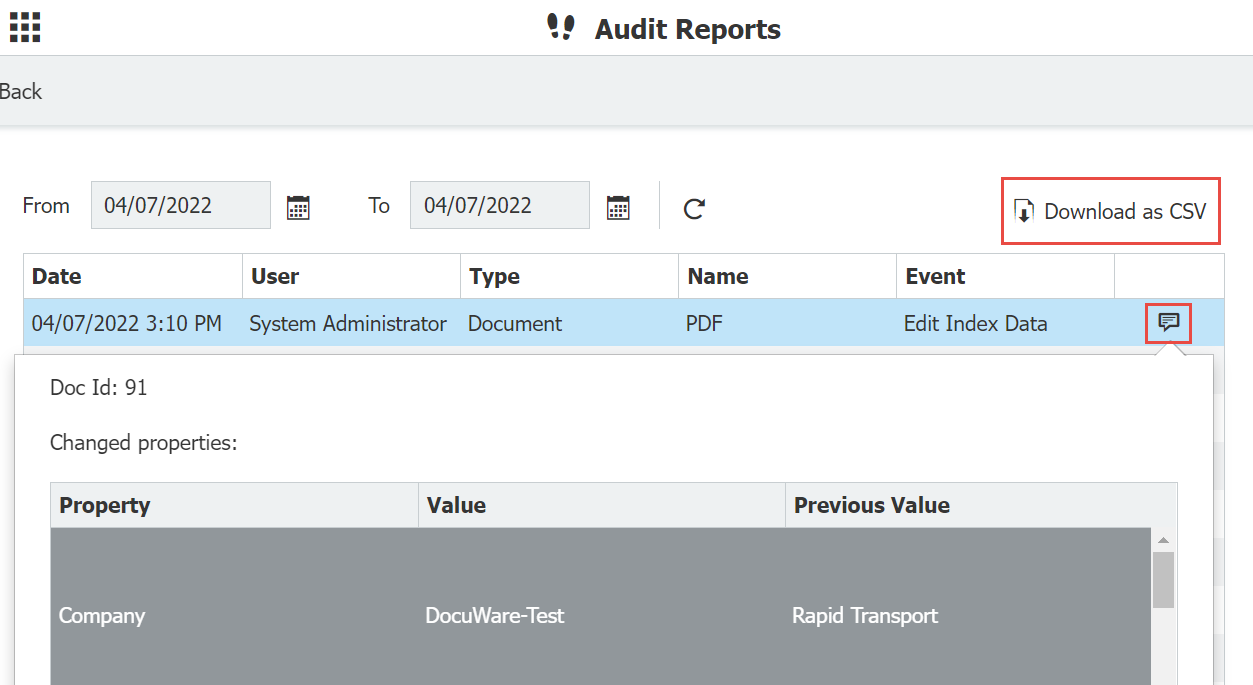
3. Use the quote icon on the right of the audit report and to display the document's DocID, date & time of change, the value of the current index, and the previous index before the change. To pull this information for multiple documents, "Download as CSV" can be used to export all the data to a CSV file. To restore the mistakenly altered indexes, the CSV will need to be downloaded.
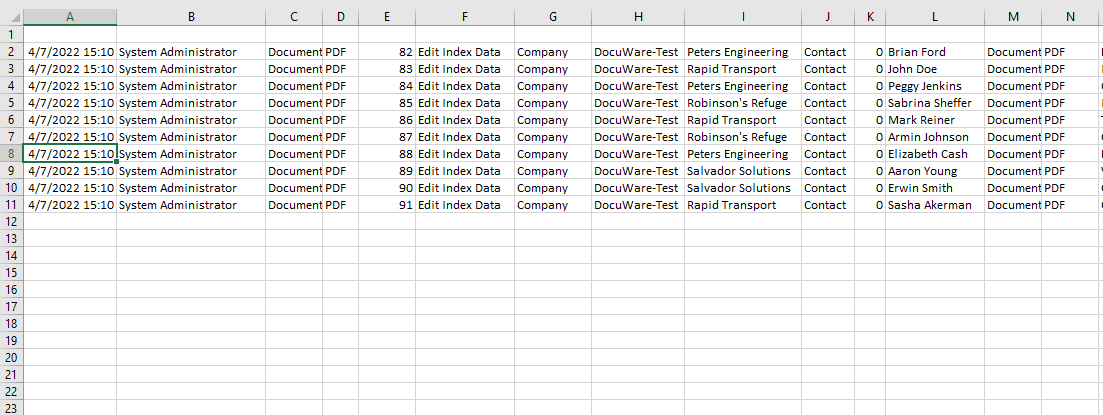
4. Open the CSV file and identify all the altered documents. Once you have identified all the altered documents, copy all the data associated with the documents and paste it into a new Excel spreadsheet.
(Note: Below depicts all the altered documents with their associated data placed in a new spreadsheet)
5. Verify that all the data and columns have been copied over correctly, then export the new file as a CSV file. For this demonstration, the CSV file was named Restore.csv
6. Next, we must create an external file connection for the Restore.csv file. Please refer to the following on how this process to done:
How can I create external file connections in DocuWare Cloud?
How can I create external file connections? (On-Premise)
How can I create external file connections in DocuWare Cloud?
How can I create external file connections? (On-Premise)
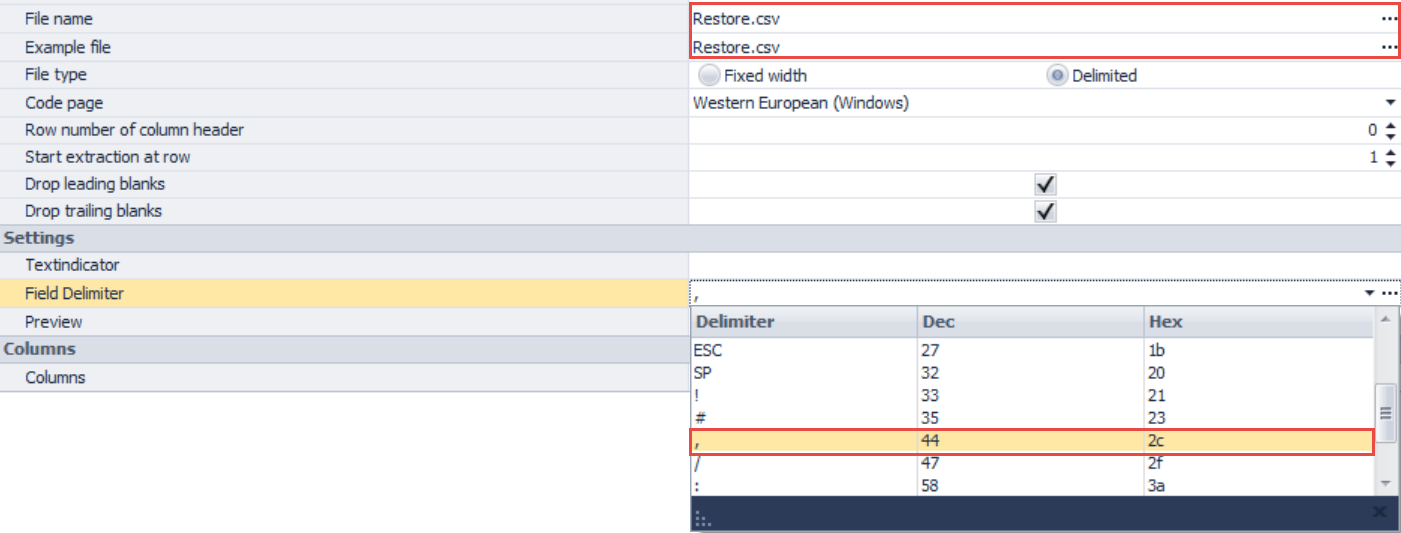
7. Once your file connection has been created, select the CSV file from the location using the ellipse, then change the Field Delimiter to ","
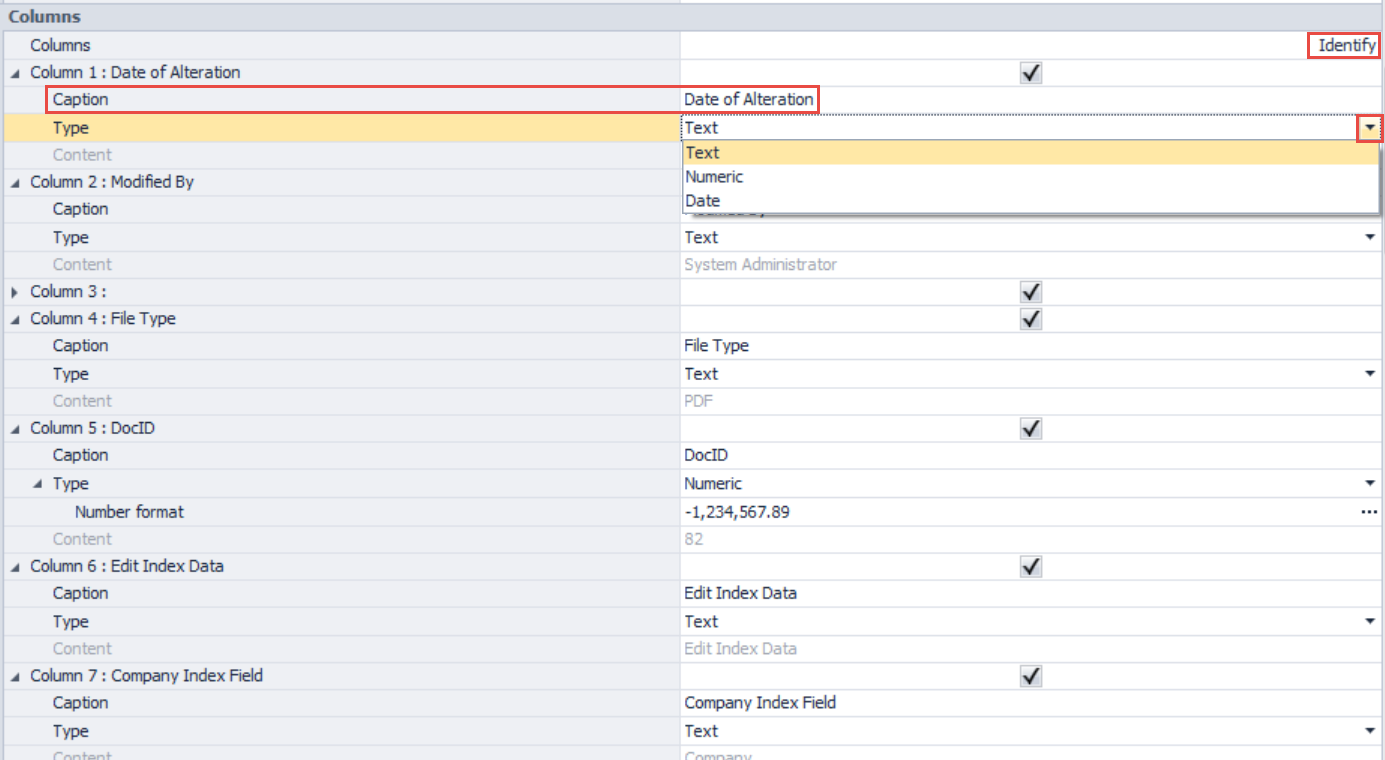
8. Click on "Identify" and the columns from our CSV will populate alongside their data. It is important to name each column according to the data present to better assist you in creating the restore Autoindex job. Use the dropdown towards the right of the data type to adjust these fields accordingly. Once completed, name the file connection and save all your changes.
(Note: For the DocID column, ensure this is set to a numeric field type.)
(Note: For the DocID column, ensure this is set to a numeric field type.)
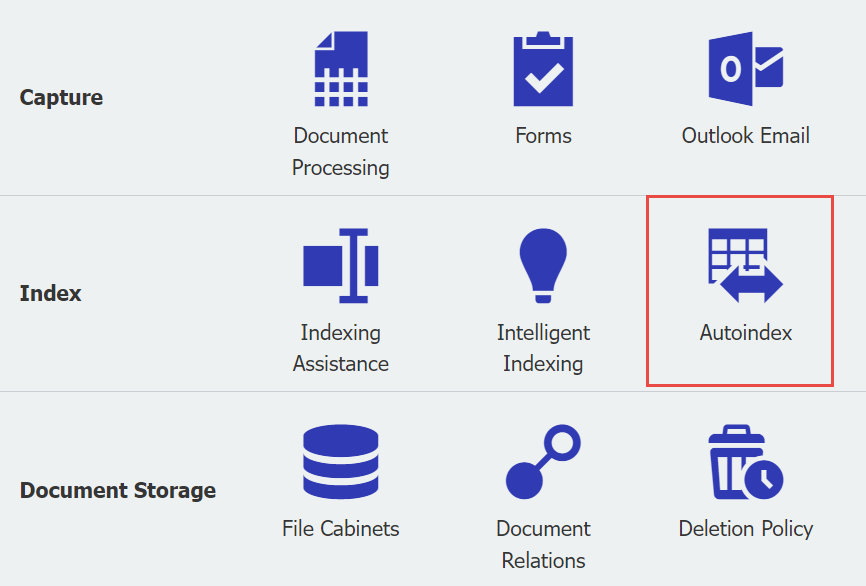
9. Once you have named all the columns and adjusted the data types accordingly, navigate to the Autoindex plugin located on the configurations page.
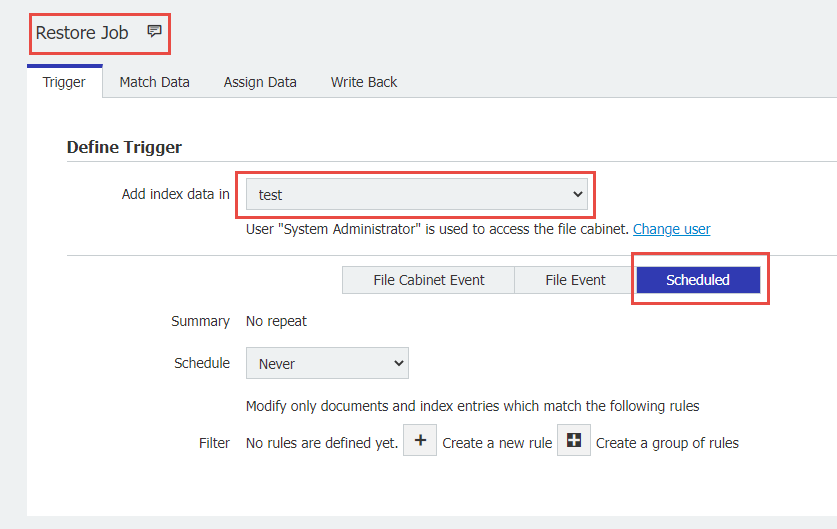
10. Create a new Autoindex job using the affected file cabinet. Name the Autoindex job and set it under a Scheduled trigger as shown below;
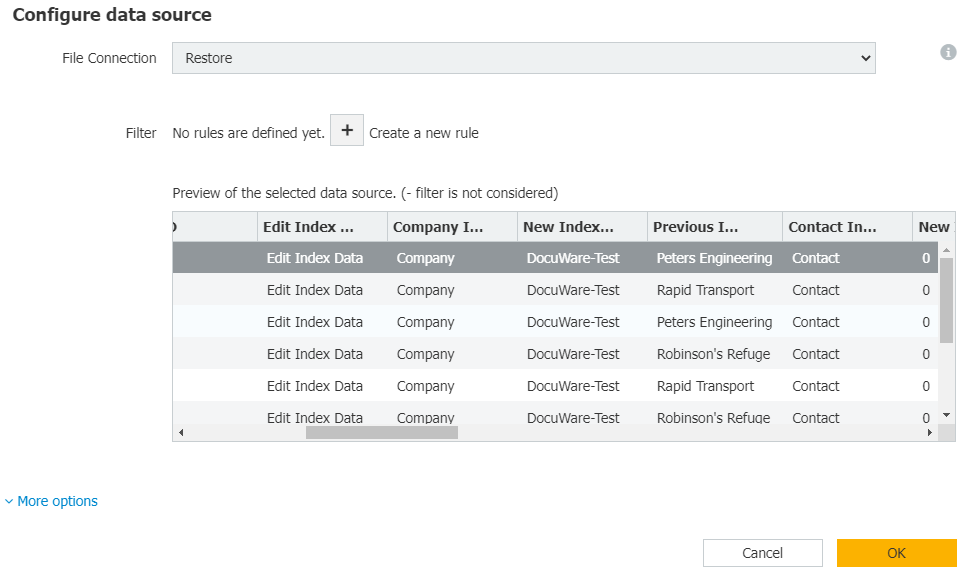
11. In the Match data tab, select text file, then click "Configure data source". From the File Connection dropdown, select the configured file connection, which will display all the columns from our CSV.
12. For the Matchcode, the DocID column will be used as the unique identifier. From the "Source" dropdown, select the column from our Restore.csv file that contains the DocID data.
(Note: If DocID option is not present in the file cabinet dropdown, please ensure that the data type for DocID is changed to numeric within the file connection.)
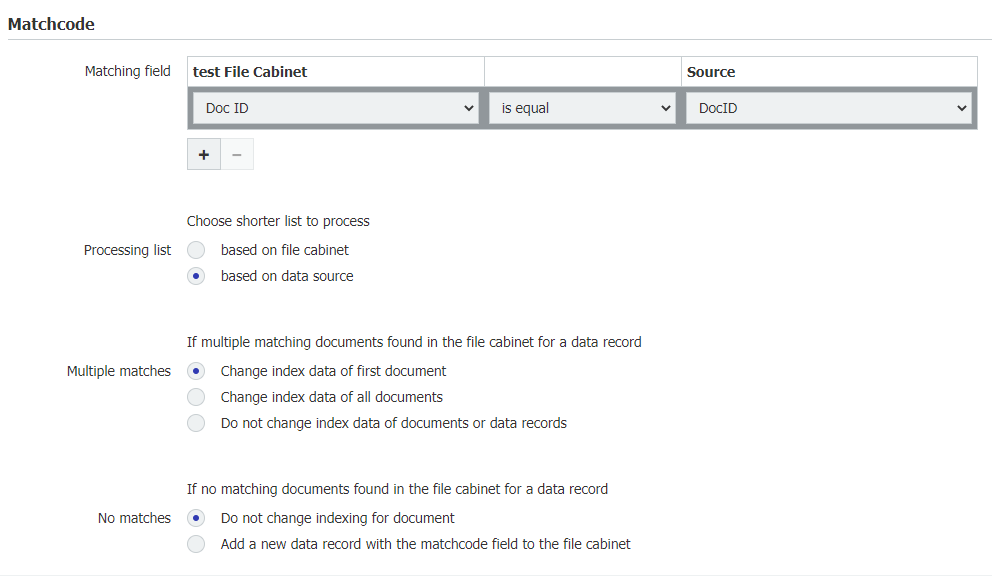
(Note: If DocID option is not present in the file cabinet dropdown, please ensure that the data type for DocID is changed to numeric within the file connection.)
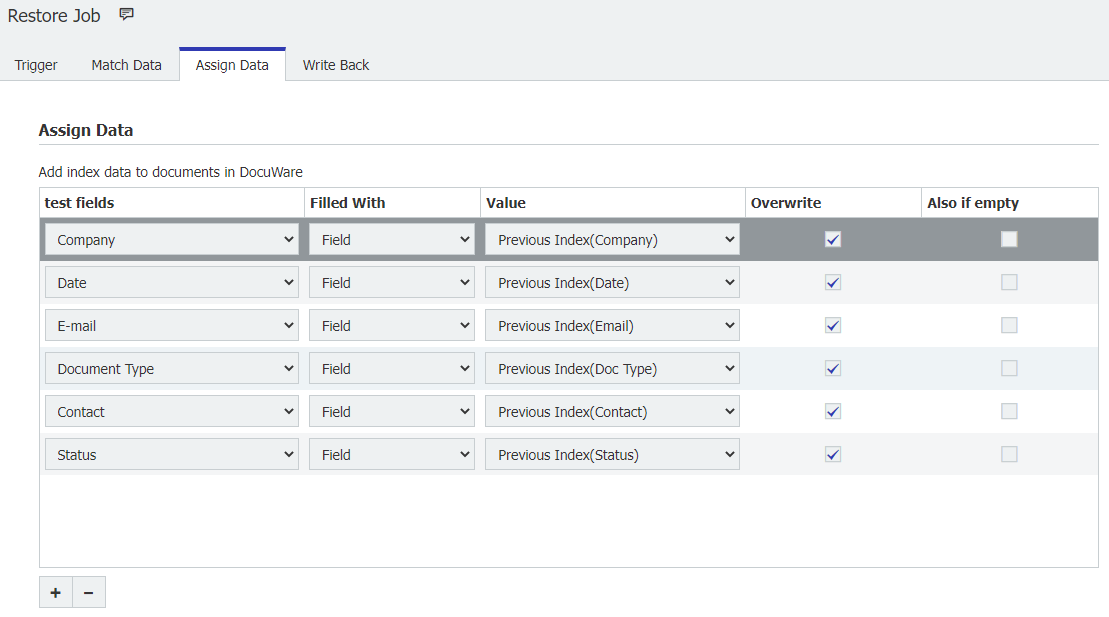
13. In the Assign Data tab, list all of the altered fields, then match them with the named columns that contain their previous index entry.
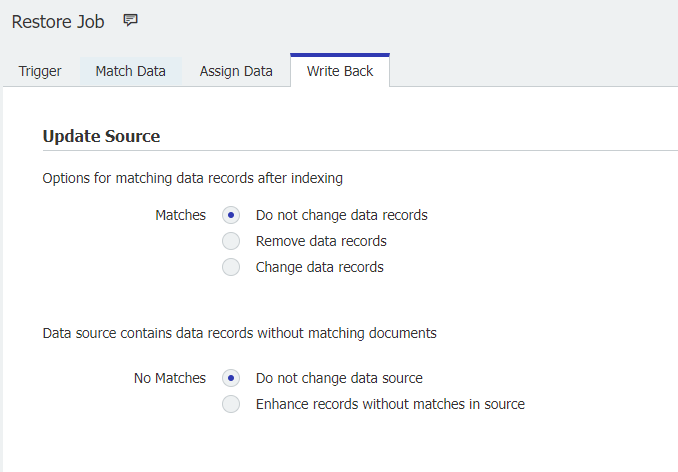
14. In the Write Back Tab, the options can be kept to their default entries. Save your Autoindex job, then navigate back to the Autoindex home screen.
15. Lastly, manually run the job by clicking on the "Start Now" icon. Once the job is completed, all your indexes should now be restored to their previous indexes.

KBA is applicable to On-premise Organizations ONLY.