¿Cómo puedo evitar el uso de conexiones de archivos en Autoindex y utilizar en su lugar un archivador auxiliar?
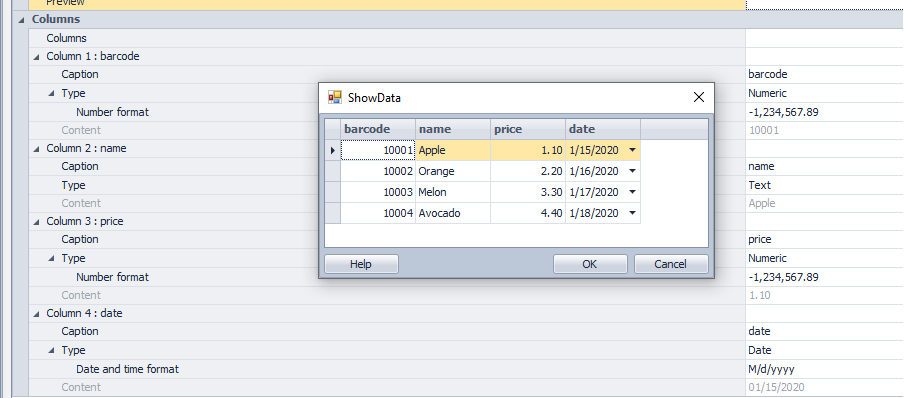
Para este ejemplo se utiliza un fichero de ejemplo separado por punto y coma:
10001;Manzana;1.10;15/01/2020
10002;Naranja;2.20;16/01/2020
10003;Melón;3.30;17/01/2020
10004;Aguacate;4.40;18/01/2020
1. Cree una conexión de archivo y utilice un archivo CSV o de texto con separadores, utilice la identificación de columna para asegurarse de que el archivo es utilizable y correcto:
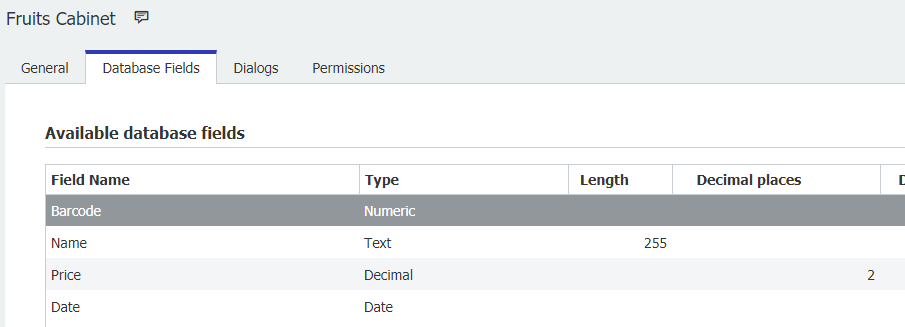
3.3. Cree un Autoindex programado para transferir los datos del fichero al nuevo Archivador:
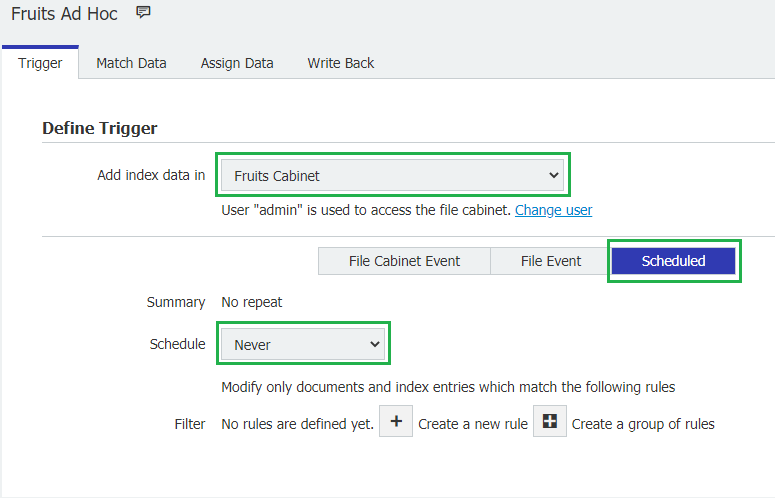
- Seleccione el Gabinete de Archivos recién creado.
- Seleccione la opción Programado
- Seleccione Programar - Nunca (Ya que sólo necesitamos ejecutarlo una vez)
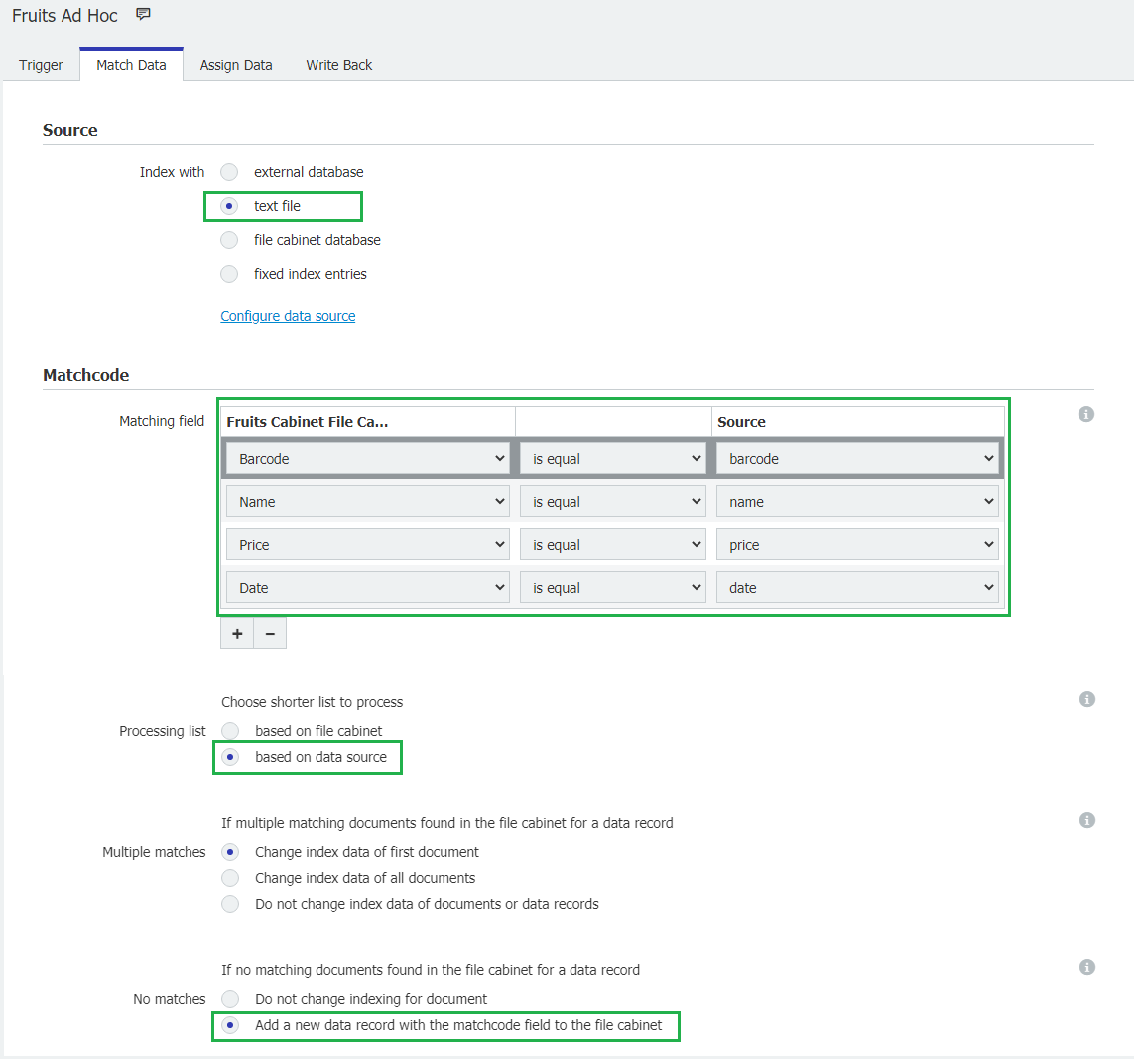
- Elija la conexión de archivos
- Añada todos los campos deseados como códigos de coincidencia
- Basar el Autoíndice en la fuente de datos
- Elija la opción Añadir nuevos registros de datos al Archivador
Nota: También es posible adaptar este Autoíndice inicial para actualizar el Archivador con nuevos datos, pero esto no entra en el ámbito de este cómo hacerlo.
4. Guardar y ejecutar 4. Guarde y ejecute

Verifique la ejecución y compruebe el número de registros actualizados.
Nota: Las filas idénticas del archivo de texto se importarán una sola vez.
5. Abra el Cliente web y compruebe los registros importados. Abra el Cliente Web y verifique los datos importados
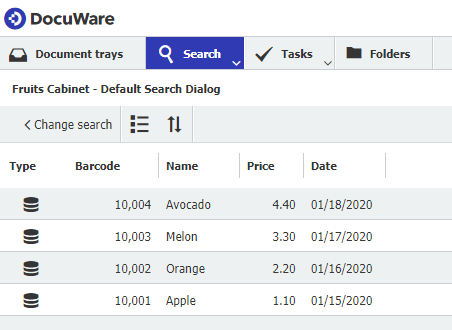
6. Si todo es correcto, puede eliminar el Autoíndice programado si ya no es necesario.
Conecte cualquier Autoíndice al Archivador recién rellenado.
Plan A - Conectar con la base de datos del archivador (solución preferida)
Elija "base de datos externa" y seleccione "Configurar fuente de datos"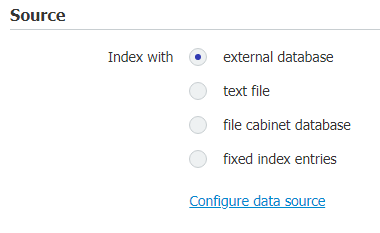
Seleccione la base de datos del Archivador.
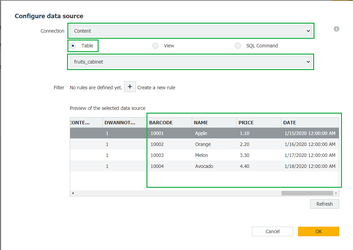
- Elija la conexión al servidor de contenidos
- Seleccione la tabla
- Busque y seleccione el archivador que contiene los datos.
- Verifique que los datos son correctos.
- Haga clic en OK
Plan B - Conectarse al archivador (solución opcional)
Nota: Elija esta opción sólo si no es posible conectarse al archivador.
Elija "base de datos del archivador" y pulse "Configurar fuente de datos"
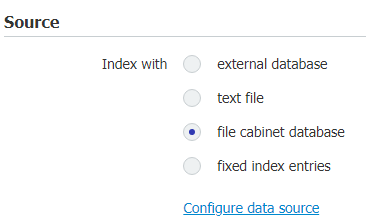
Seleccione el archivador
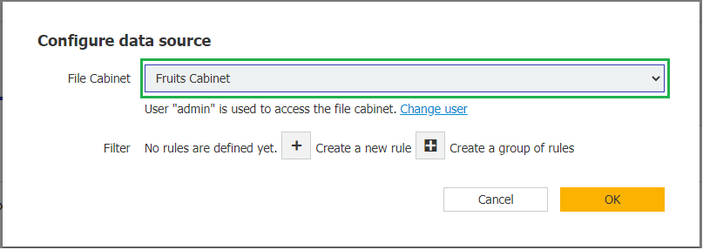
Continúe configurando el índice automático según sus necesidades.
KBA es aplicable SÓLO a organizaciones locales.
Nota: Este artículo es una traducción del inglés. La información contenida en este artículo se basa en la versión original del producto en inglés. Puede haber errores menores, como en la gramática utilizada en la versión traducida de nuestros artículos. Aunque no podemos garantizar la total exactitud de la traducción, en la mayoría de los casos le resultará suficientemente informativa. En caso de duda, vuelva a la versión inglesa de este artículo.


